If you are working in a larger organization, the time will come when you may need to create bulk Active Directory user accounts.
You can certainly create these accounts one by one manually, but it would be a very inefficient and time-consuming task.
Luckily, you can perform this task easily with PowerShell and a CSV file.
In this tutorial we’ll show you how to create bulk user accounts in Windows Active Directory via both PowerShell and Some free Utilities that we’ve found online to assist you in the process
There are two ways to create bulk user accounts in Active Directory and we’ll discuss the steps for each method below.
1. Free Software Tool to Accomplish this Task (Our Preferred Method)
2. PowerShell script using a CSV File
Before we can start, we’ll need install some Modules, as seen in the next step:
Install Required Modules
Before starting, you will need to install the PowerShell Active Directory module and PowerShell ISE module on your system:
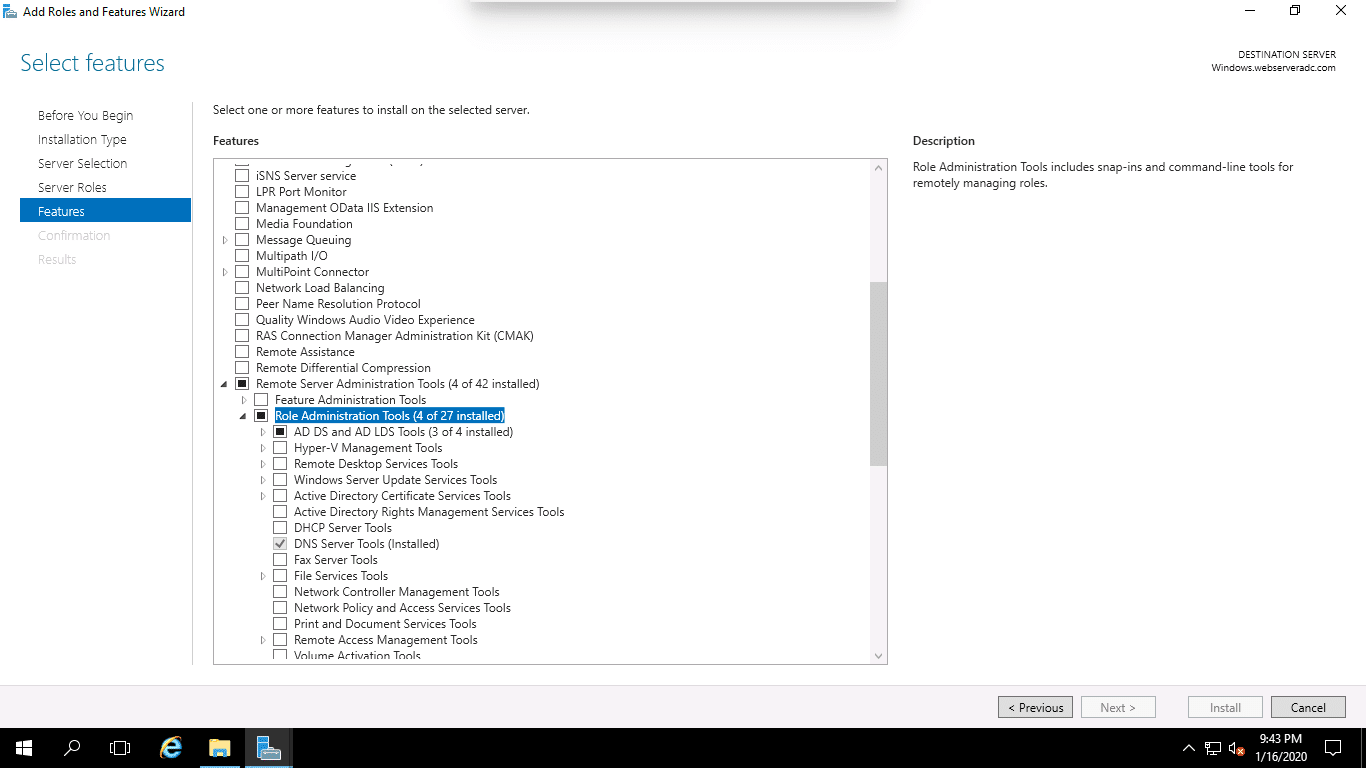
You can install the PowerShell active directory module by following the below steps:
1. Open the Server Manager.
2. Click on Add Roles and Features.
3. Click on the Next button until you reach Features.
4. Click on the Remote Server Administration Tools => Role Administration Tools => AD DS and AD LDS Tools and click on the Install button.
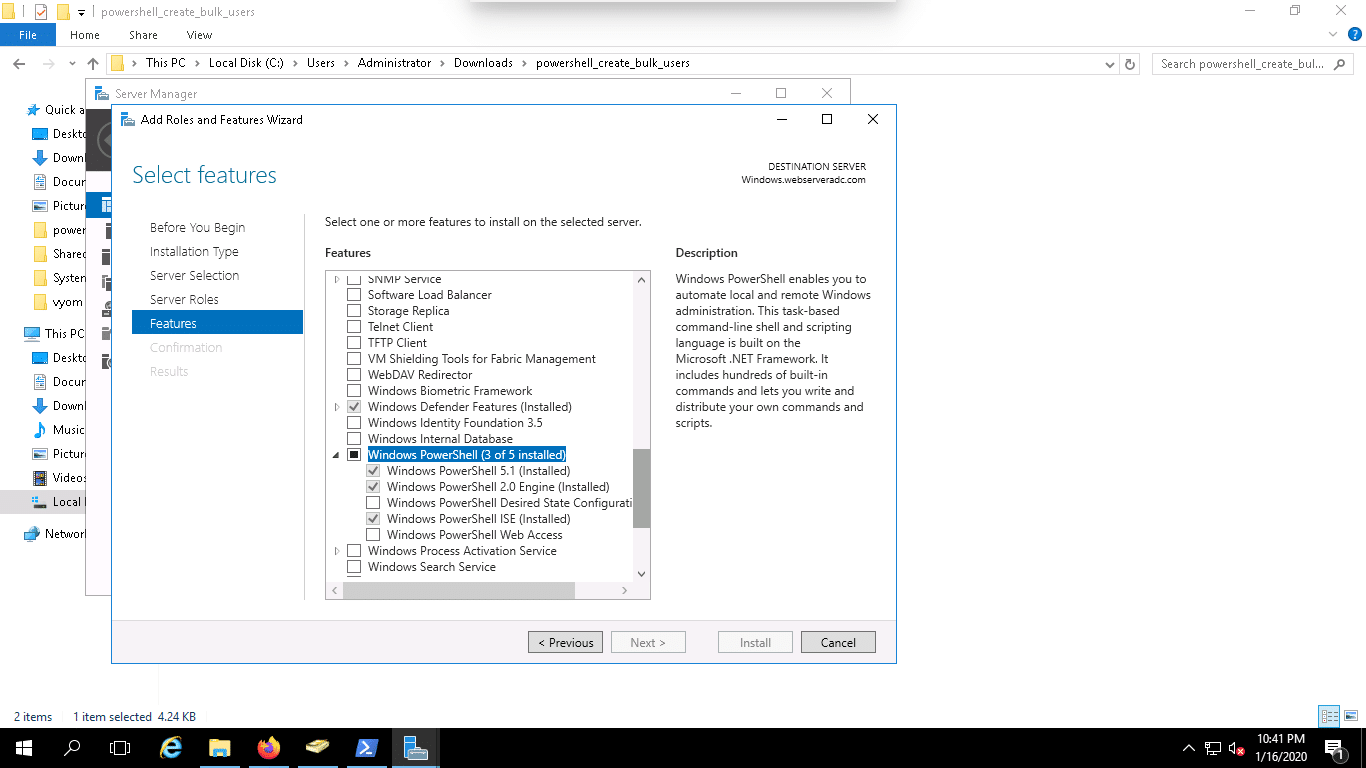
You can install the PowerShell ISE module by following the below steps:
1. Open the Server Manager.
2. Click on Add Roles and Features.
3. Click on the Next button until you reach Features.
4. Click on the Windows PowerShell => Windows PowerShell ISE and click on the Install button to install this module.
Create Bulk Users with Free Bulk Import Tool – (Our Preferred Method)
You can also create bulk users with SolarWinds GUI tools.
In this section, we will download and install SolarWinds tool, create a CSV file with all user details and import all users from CSV file with SolarWinds tool.
Download and Install SolarWinds
You can download and install the SolarWinds tool by following the below steps:
1. Download SolarWinds Admin Bundle for Active Directory tool.
2. Extract the downloaded file and run the UserImportTool.msi.
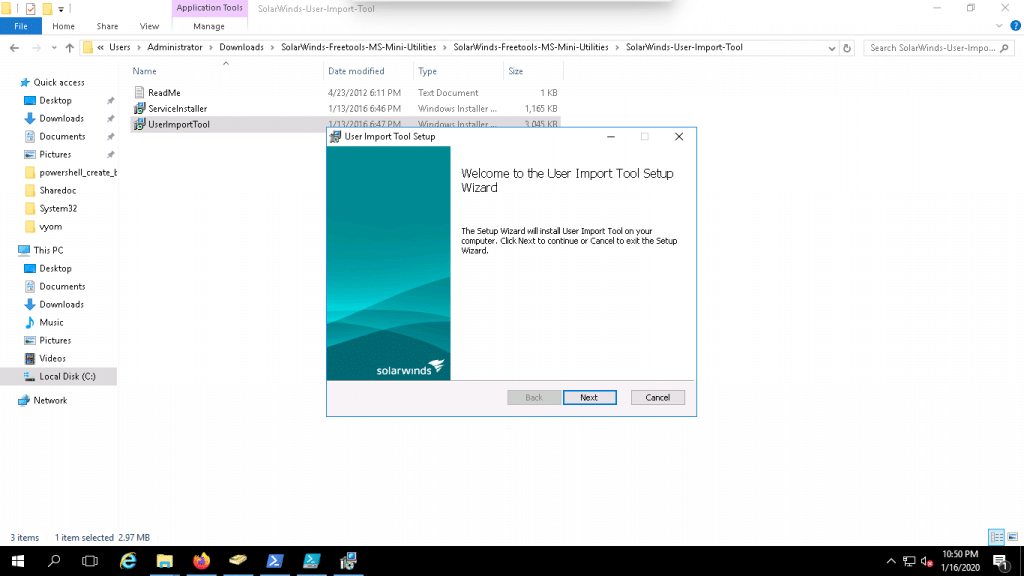
3. Click on the Next button.
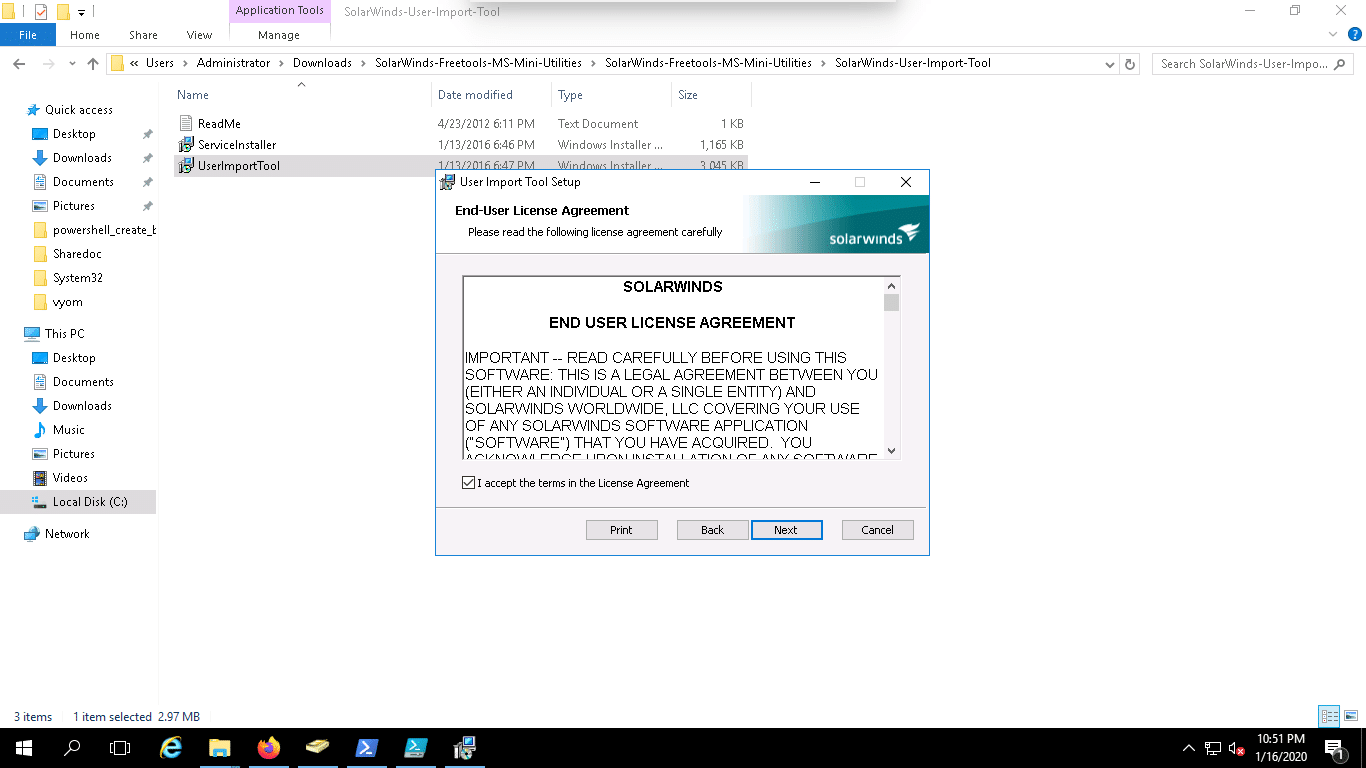
4. Accept the License agreement and click on the Next button.

5. Provide installation folder and click on the Next button.
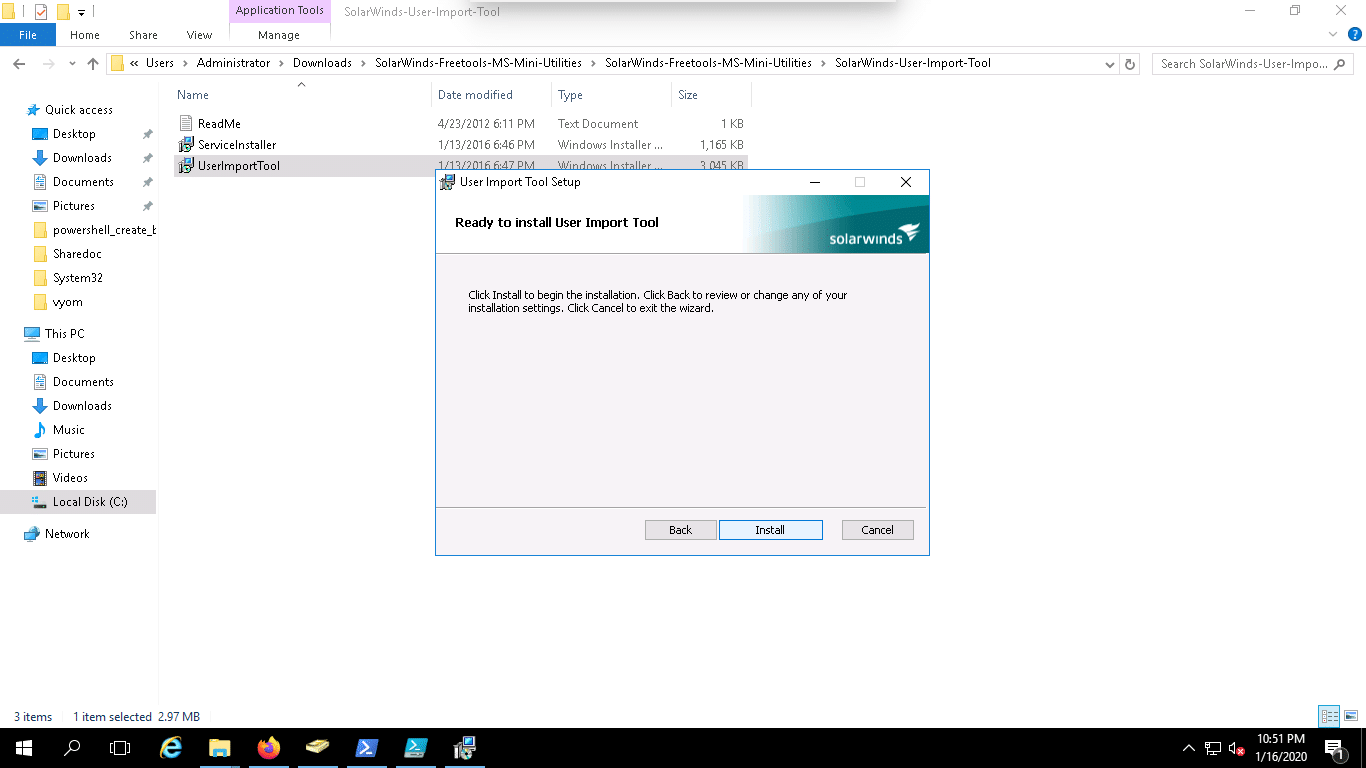
6. Click on the Install button to start the installation.
7. Click Finish button to finish the installation.
Create a CSV File
Next, you will need to create a CSV file with all user details.
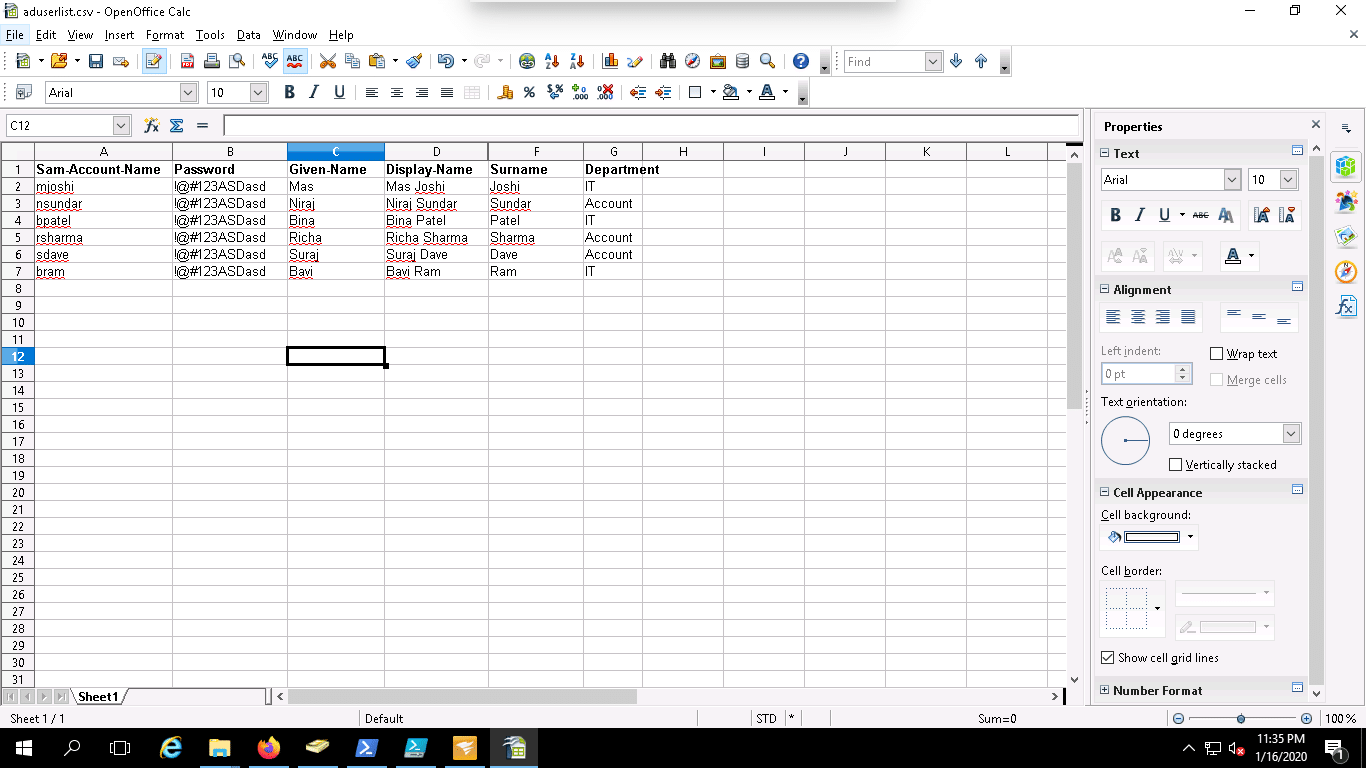
We will create a CSV file named aduserlist.csv with the following fields:
Sam-Account-Name = logon name
Password = Password
Given-Name = First Name
Display-Name = Display name:
Surname = Last Name
Department = Department
You can see the screenshot of the CSF file in the following page:
Note: If you don’t specify an organizational unit it will use the default OU (Users).
Import User with SolarWinds Tool
*NOTE: if you haven’t already downloaded the free tool, click on the Download link below to download 100% Free*
You can import the users from a CSV file by following the below steps:
1. Open the SolarWinds Tools, select the CSV file, Provide your domain name, administrator credential and click on the Test Credentials as shown below:
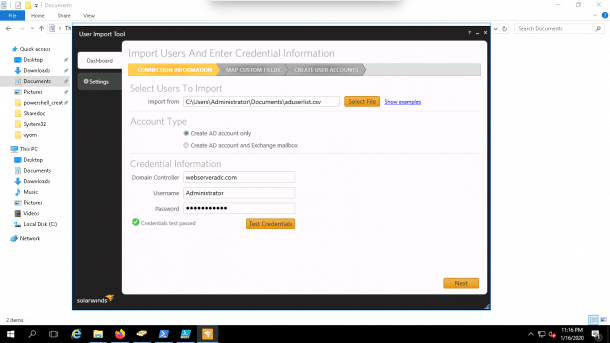
2. Click on the Next button.
You should see the MAP CUSTOM FIELDS wizard.
Here, you will need to add all the fields as per your CSV file as shown below:
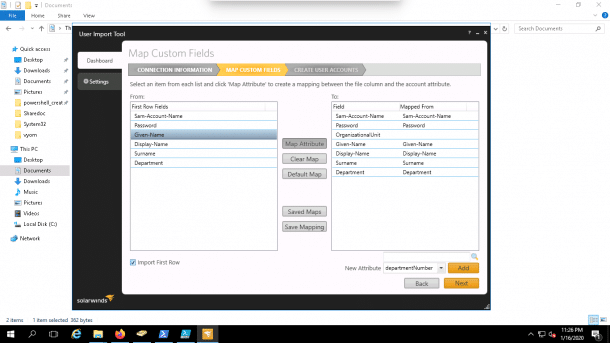
3. Once you are finished, click on the Next button.
You should see the Users preview in the following page:

4. Now, click on the Create button to import all users from a CSV file.

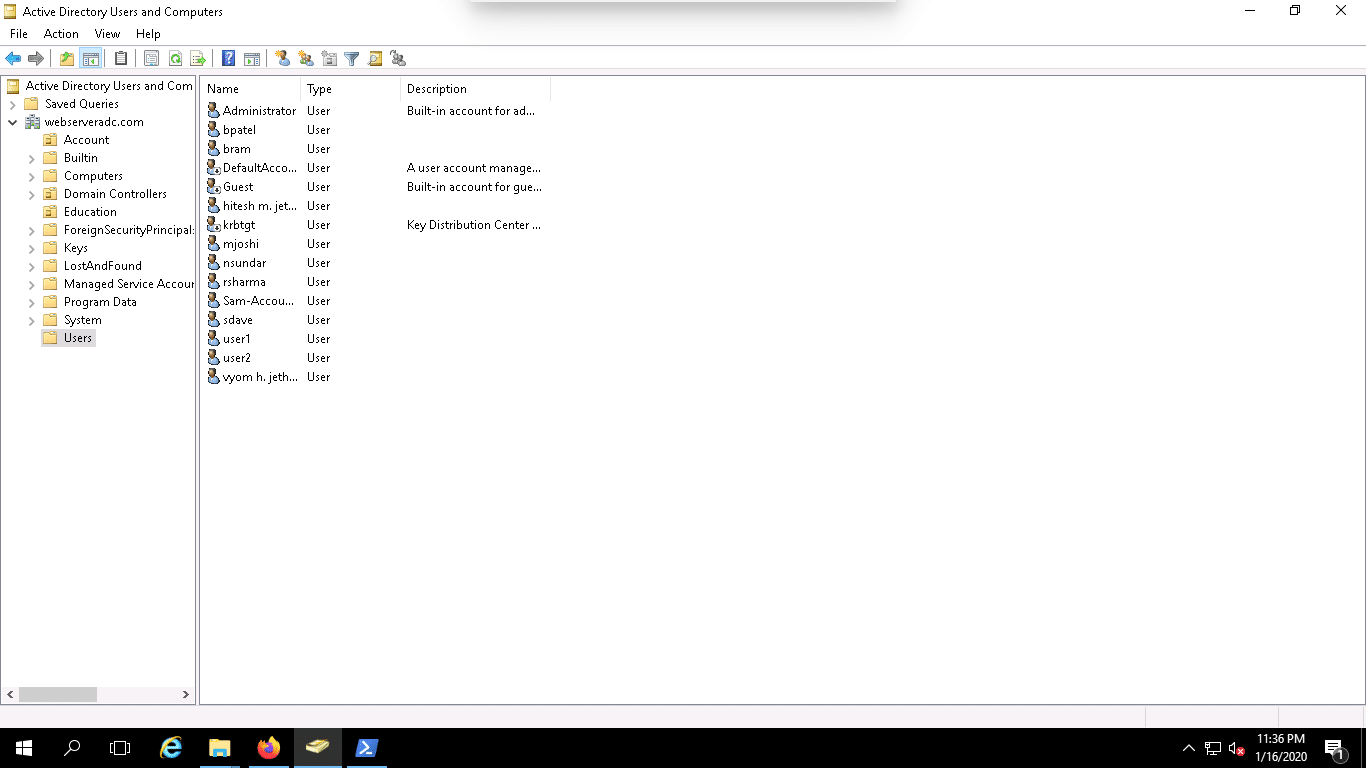
Now, open the Active Directory Users and Computers and check the Users OU whether user accounts are created or not as shown below:
Create Bulk Users with PowerShell and CSV File
In this section, we will create a CSV file with all user account details including username, password, first name, last name, etc.
Then we’ll import these users using the PowerShell script.
Create a CSV File
First, lets create a CSV file named userlist.csv in the Documents folder with the following details:
first name, last name, username, password
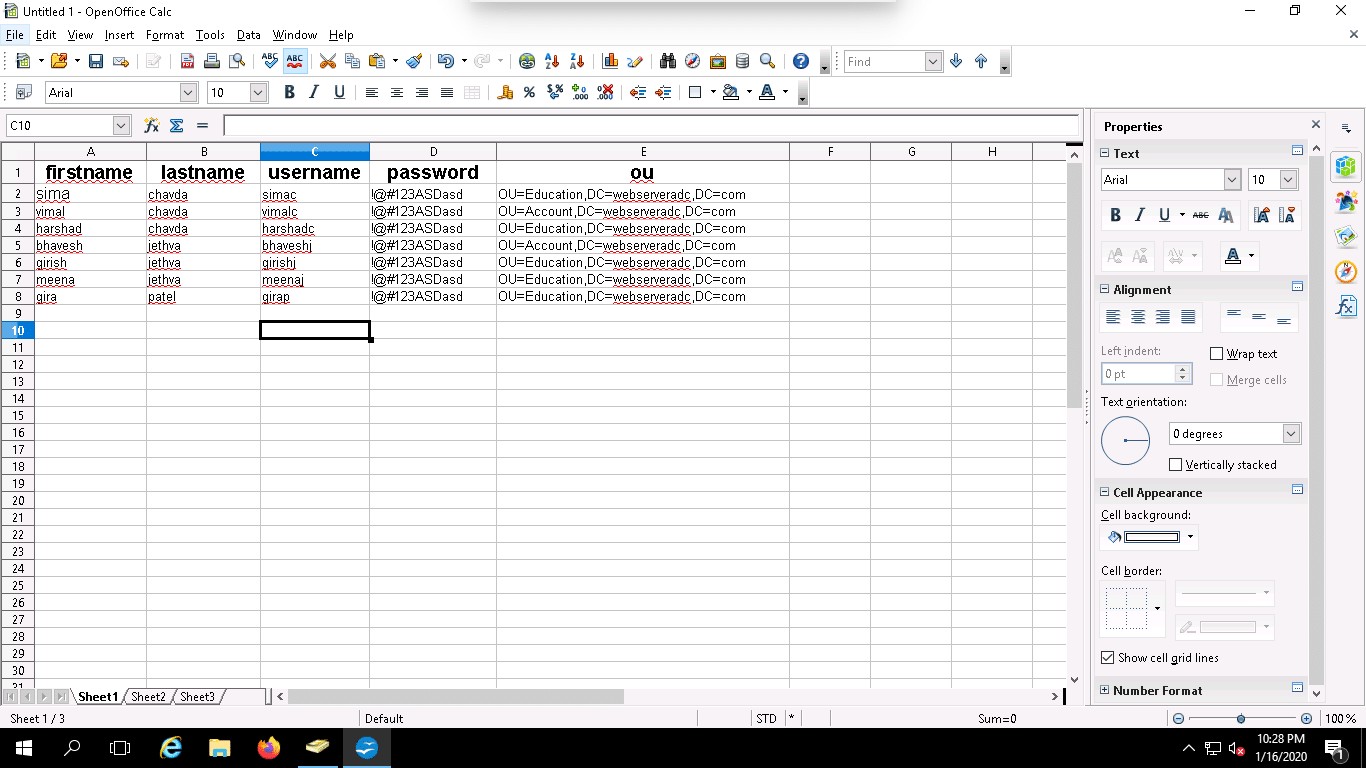
In the above screenshot, I have setup five user accounts for Education OU and two user accounts for Account OU.
You can set it as per your own need.
You can find the OU path by following the below steps:
1. Open the Active Directory Users and Computers.
2. Click on the View => Advanced Features.
3. Right click on the specific OU and click on the Properties.
4. Click on the Attribute Editor and double click on the distinguishedName field as shown below:
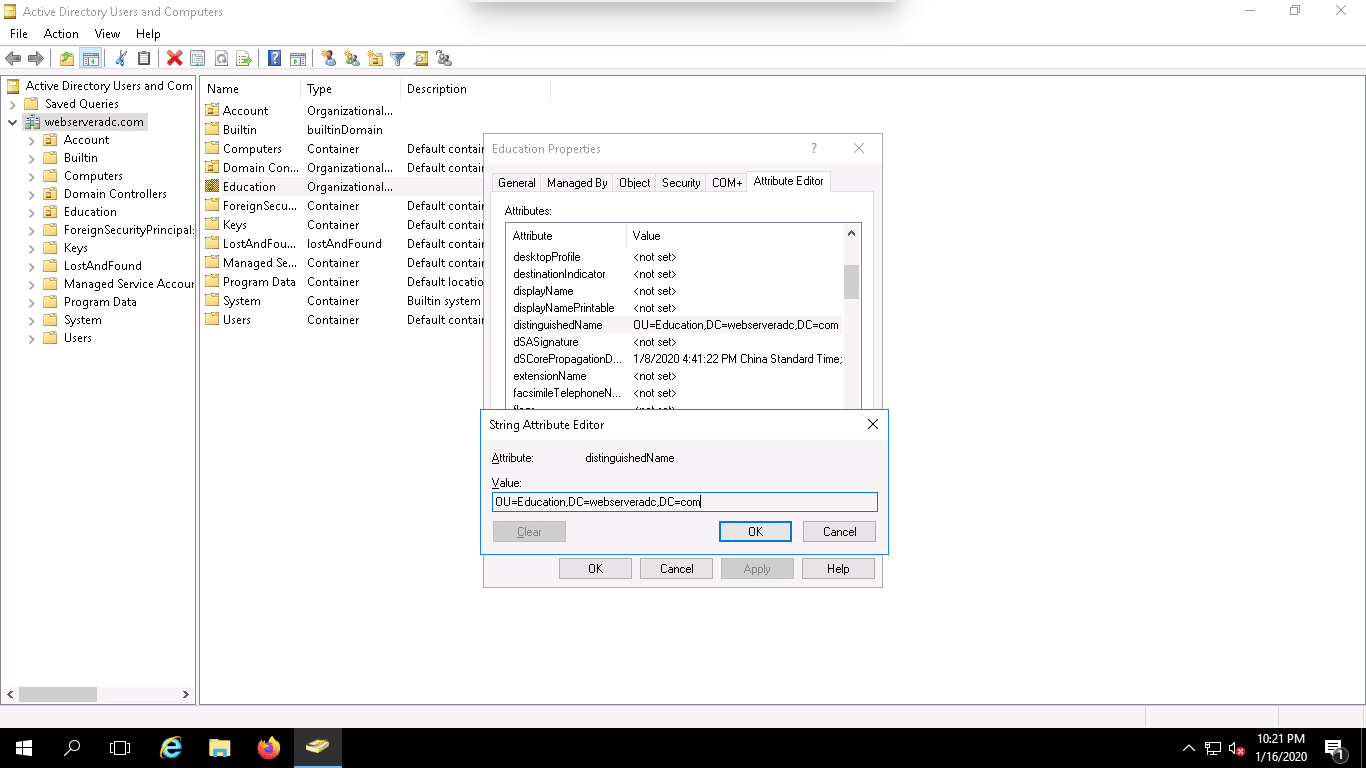
You can copy the above path into the OU column of your CSV file.
Create the PowerShell Script
Your CVS file with all user account details is ready.
Now, you will need to create the PowerShell script to import the users from a CVS file.
You can create the PowerShell script by following the below steps:
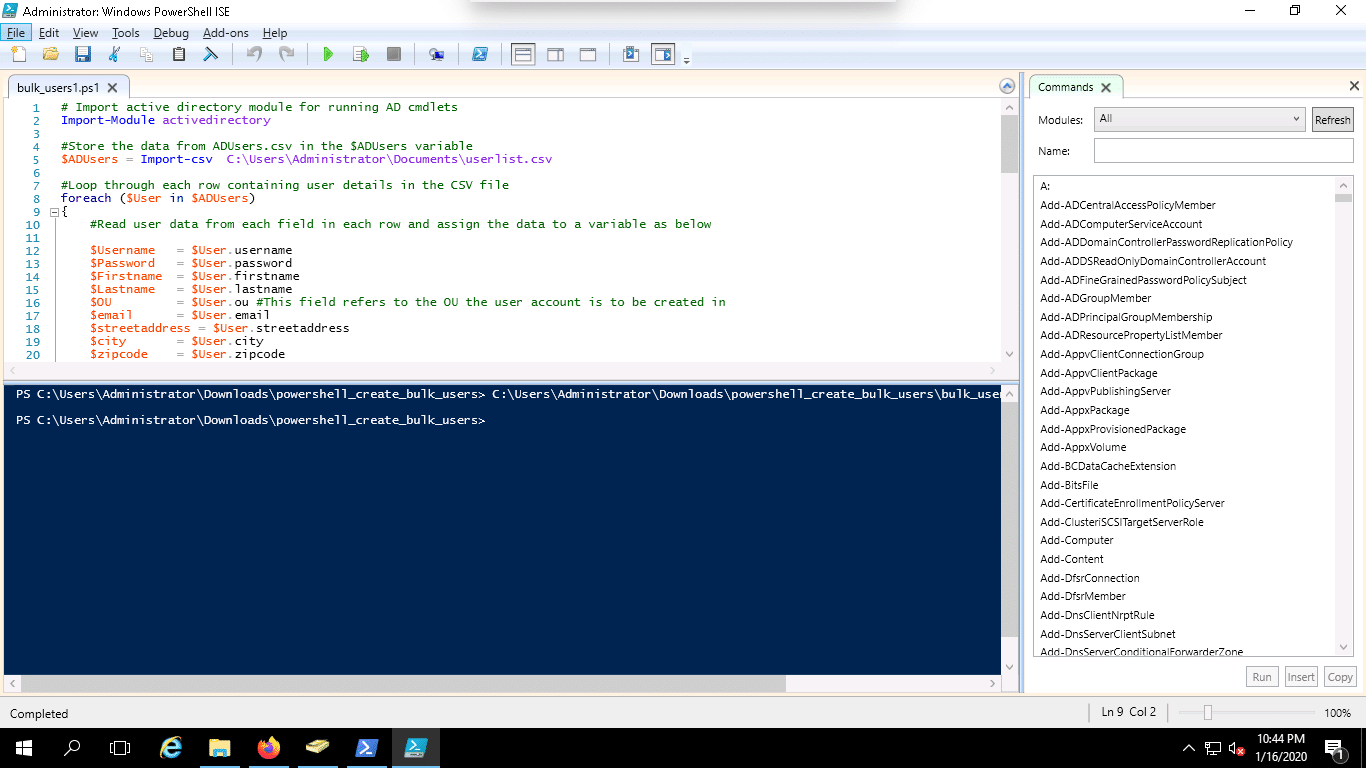
1. Open your notepad and add the following codes:
# Import active directory module for running AD cmdlets

Import-Module activedirectory

#Store the data from ADUsers.csv in the $ADUsers variable

$ADUsers = Import-csv  C:\Users\Administrator\Documents\userlist.csv

#Loop through each row containing user details in the CSV file

foreach ($User in $ADUsers)

{

#Read user data from each field in each row and assign the data to a variable as below

$Username 	= $User.username

$Password 	= $User.password

$Firstname 	= $User.firstname

$Lastname 	= $User.lastname

$OU 		= $User.ou #This field refers to the OU the user account is to be created in

$email      = $User.email

$streetaddress = $User.streetaddress

$city       = $User.city

$zipcode    = $User.zipcode

$state      = $User.state

$country    = $User.country

$telephone  = $User.telephone

$jobtitle   = $User.jobtitle

$company    = $User.company

$department = $User.department

$Password = $User.Password

#Check to see if the user already exists in AD

if (Get-ADUser -F {SamAccountName -eq $Username})

{

#If user does exist, give a warning

Write-Warning "A user account with username $Username already exist in Active Directory."

}

else

{

#User does not exist then proceed to create the new user account

#Account will be created in the OU provided by the $OU variable read from the CSV file

New-ADUser `

-SamAccountName $Username `

-UserPrincipalName "$Username@webserveradc.com" `

-Name "$Firstname $Lastname" `

-GivenName $Firstname `

-Surname $Lastname `

-Enabled $True `

-DisplayName "$Lastname, $Firstname" `

-Path $OU `

-City $city `

-Company $company `

-State $state `

-StreetAddress $streetaddress `

-OfficePhone $telephone `

-EmailAddress $email `

-Title $jobtitle `

-Department $department `

-AccountPassword (convertto-securestring $Password -AsPlainText -Force) -ChangePasswordAtLogon $True

}

}
2. Click on the Save as option to save the file.
3. Type a name for the script as bulk_users1.ps1.
4. Click on the Save button to save the file.
Note : You will need to modify the following lines in the above script as per your path of the CSV file and domain name:
$ADUsers = Import-csv C:\Users\Administrator\Documents\userlist.csv
-UserPrincipalName "$Username@webserveradc.com"
Run the PowerShell Script
Now, you can run the PowerShell script to import the user accounts from a CSV file by following the below steps:
1. Right click on the PowerShell script and click on the Edit button as shown below:


2. Now, click on the green button to run the script.
You should see the following screen if it ran successfully:
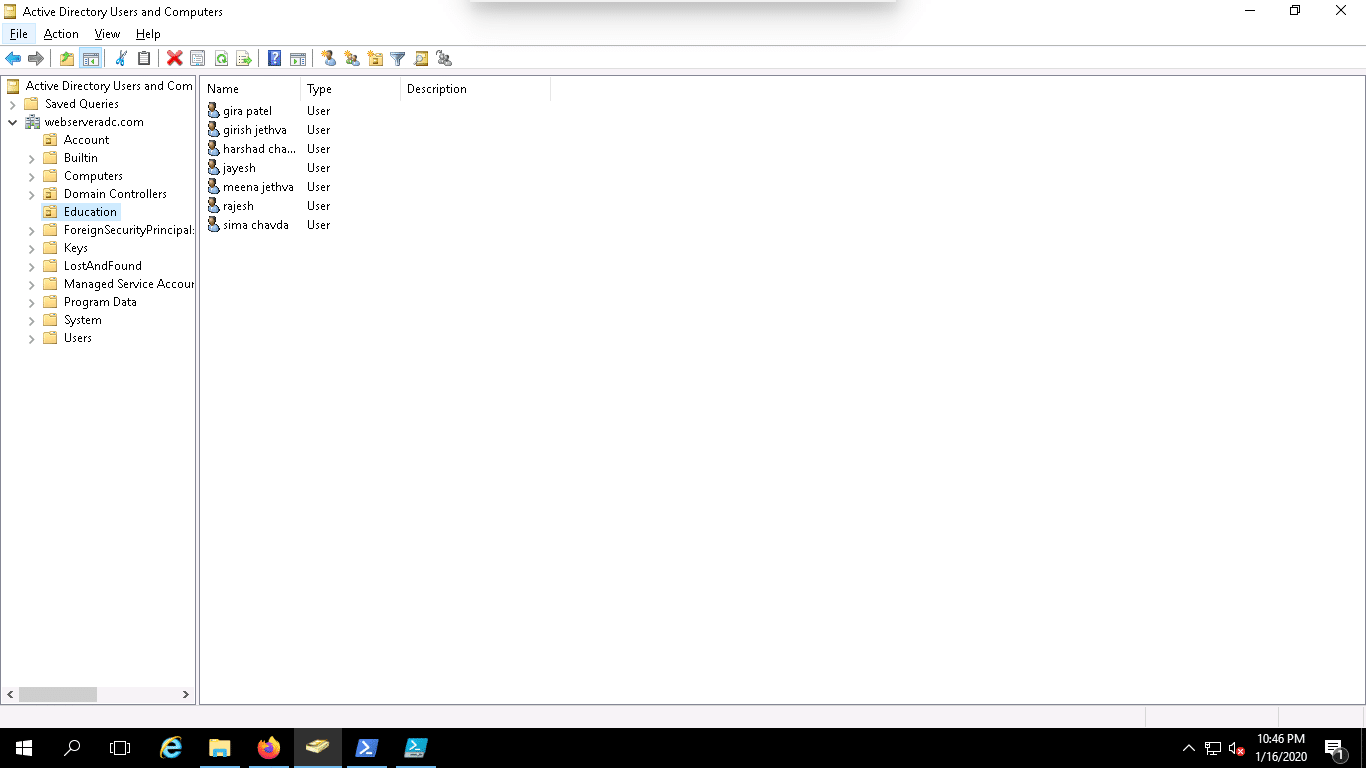
Now, open the Active Directory Users and Computers and check the Education and Account OU.
User accounts should be created as shown below:

Conclusion
In the above tutorial, we’ve learned how to Create Bulk user accounts with PowerShell and some Free Tools.
You should now be able to easily add bulk user accounts by following any of these methods above!