Mapping a network drive from the network file server to the local system is one of the most common tasks of any system administrator.
You can easily share files and folders to network users with the map network drive.
In the past, logon scripts would be used to map the network drive to the local system and this can be achieved using the Group policy as well.
Mapping a network drive with Group Policy is very flexible and in some case, better than logon scripts because logon scripts will slow down your computers during login.
Also, Group Policy automatically refreshes periodically in the background.
In this tutorial, we will show you how to map a network drive using Group Policy in Active Directory.
Map a Network Drive for Specific Department Using Group Policy
In this section, we will show you how to map a network drive for the Education Department so that only users in the Education OU get the mapped network drive:
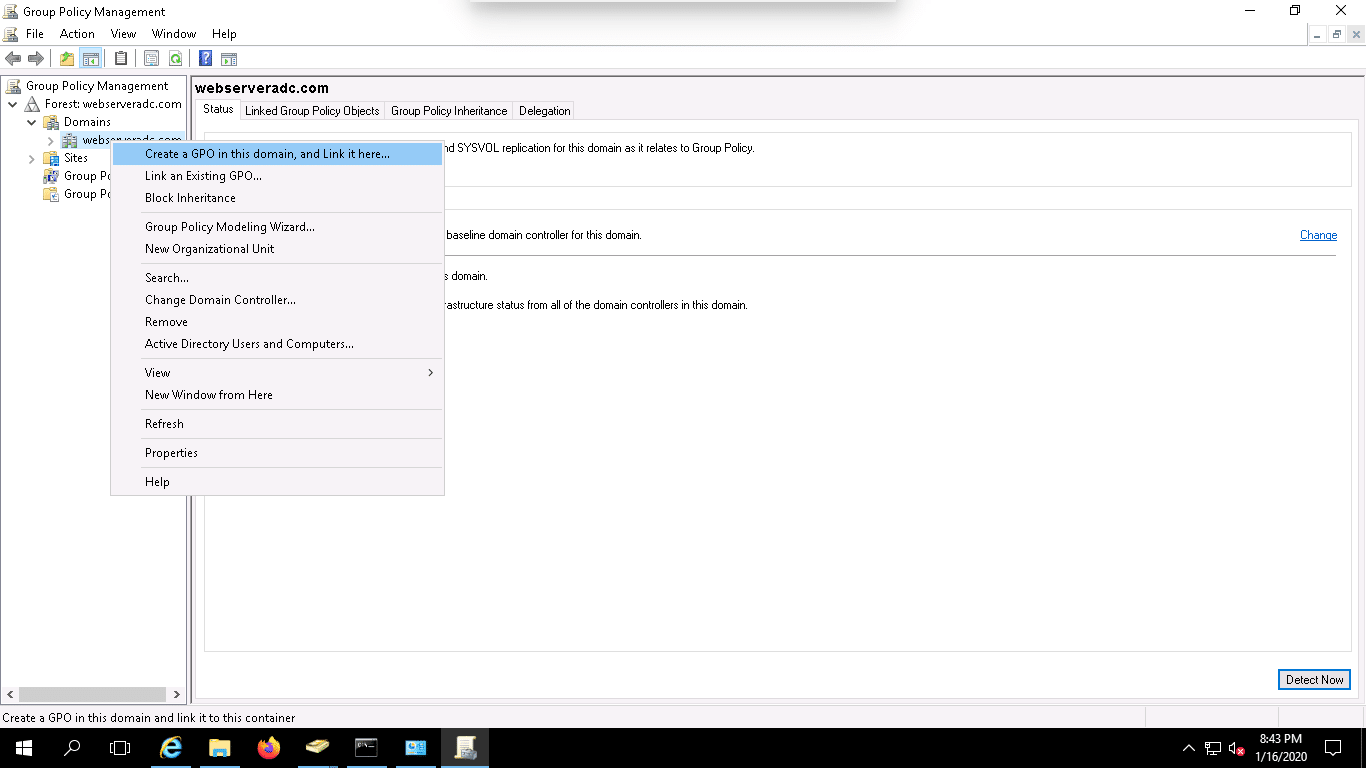
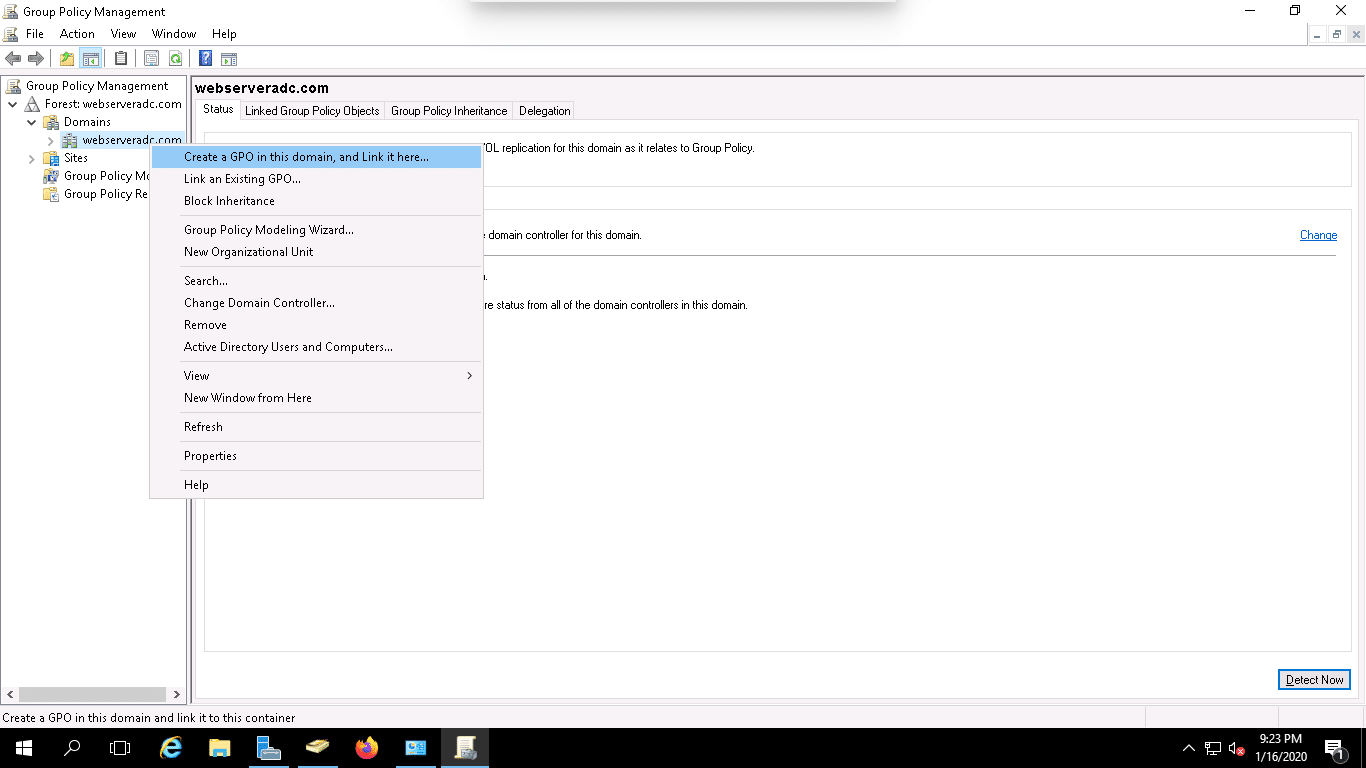
1. Open the Group Policy Management Console.
2. Right click on the webserveradc.com domain and click on the “Create a GPO in this domain, and link it here” as shown below:
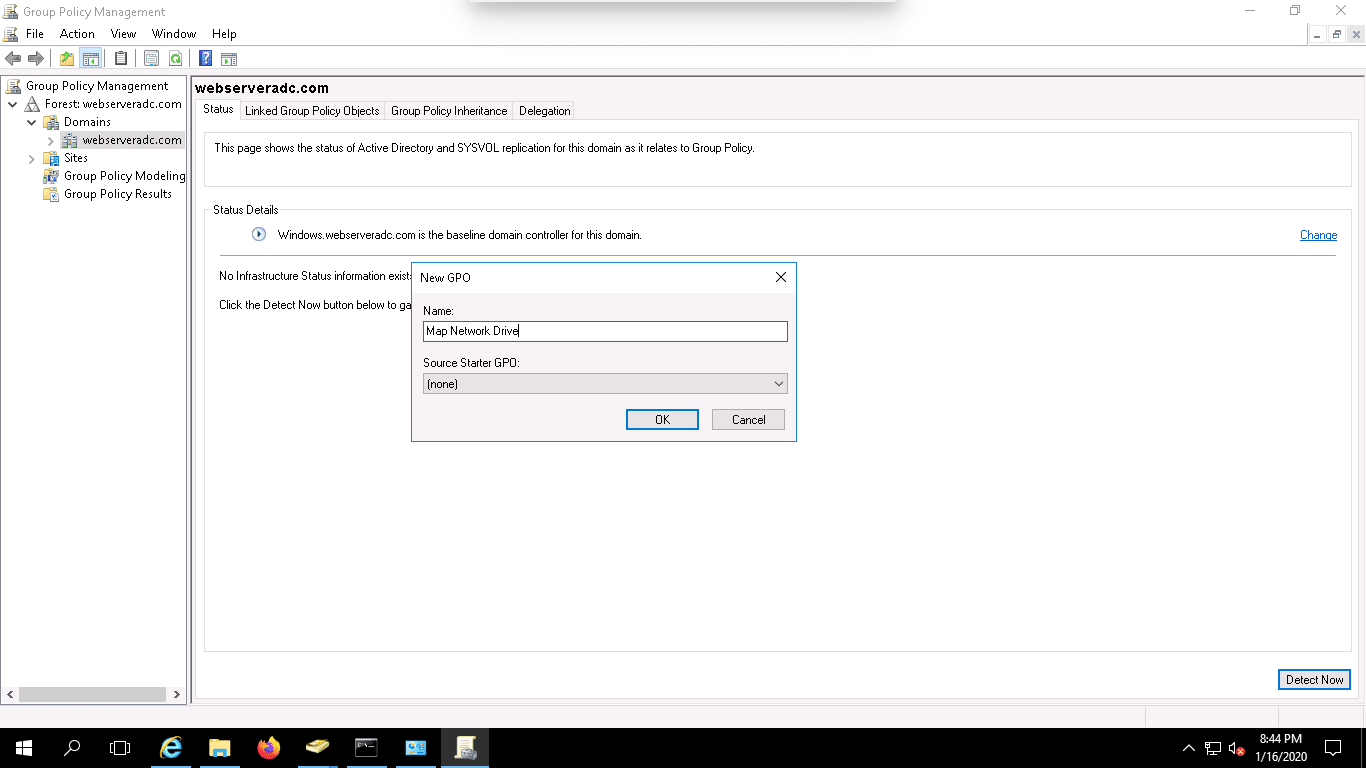
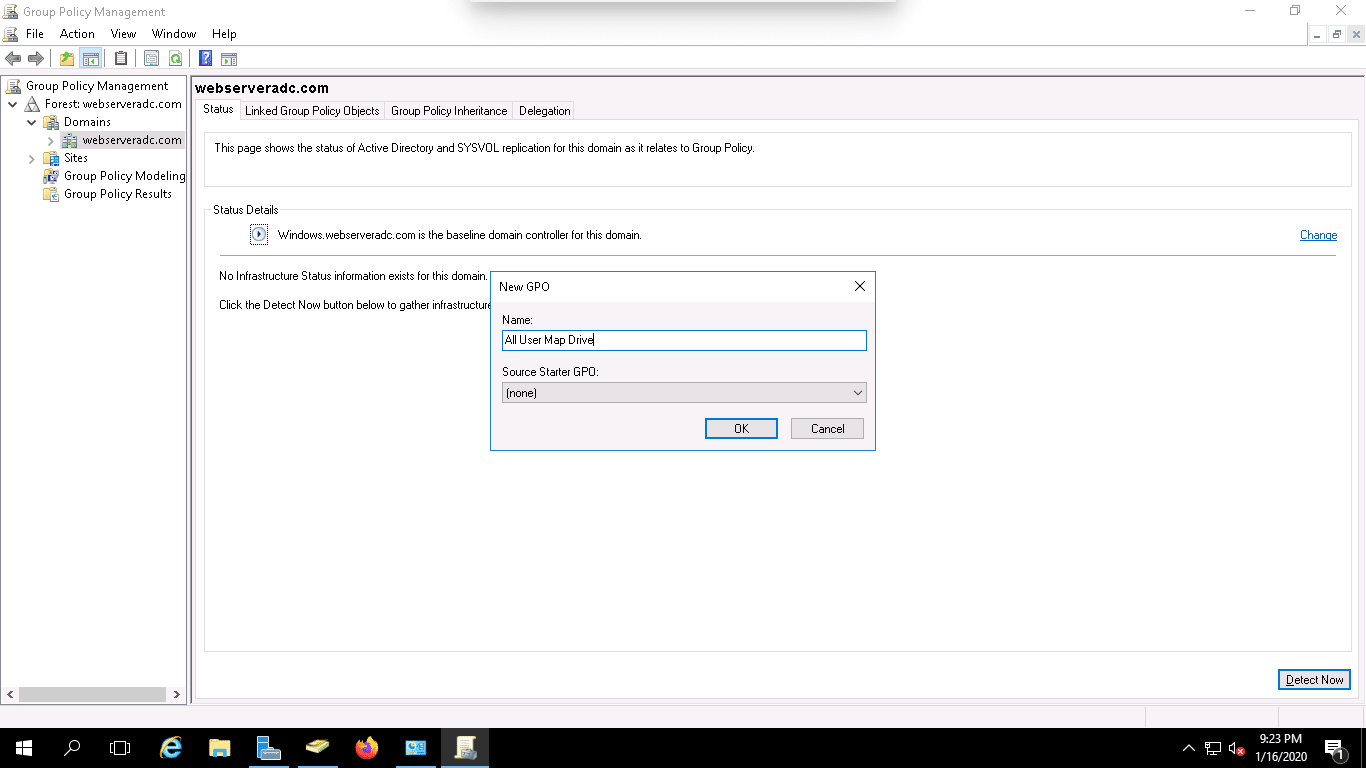
3. Provide the name of your New GPO and click on the OK button to create the GPO as shown below:
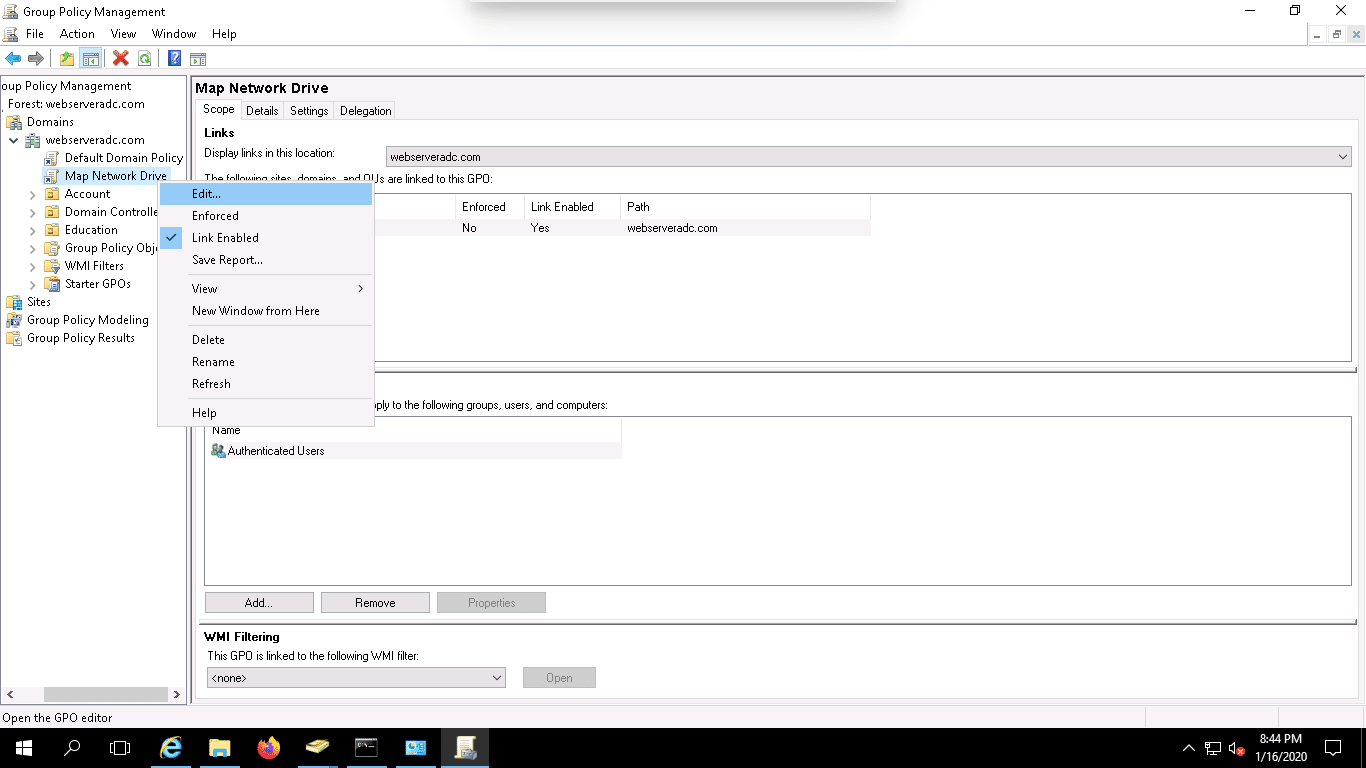
4. After creating New GPO, right click on the Map Network Drive GPO and click on the Edit button as shown below:
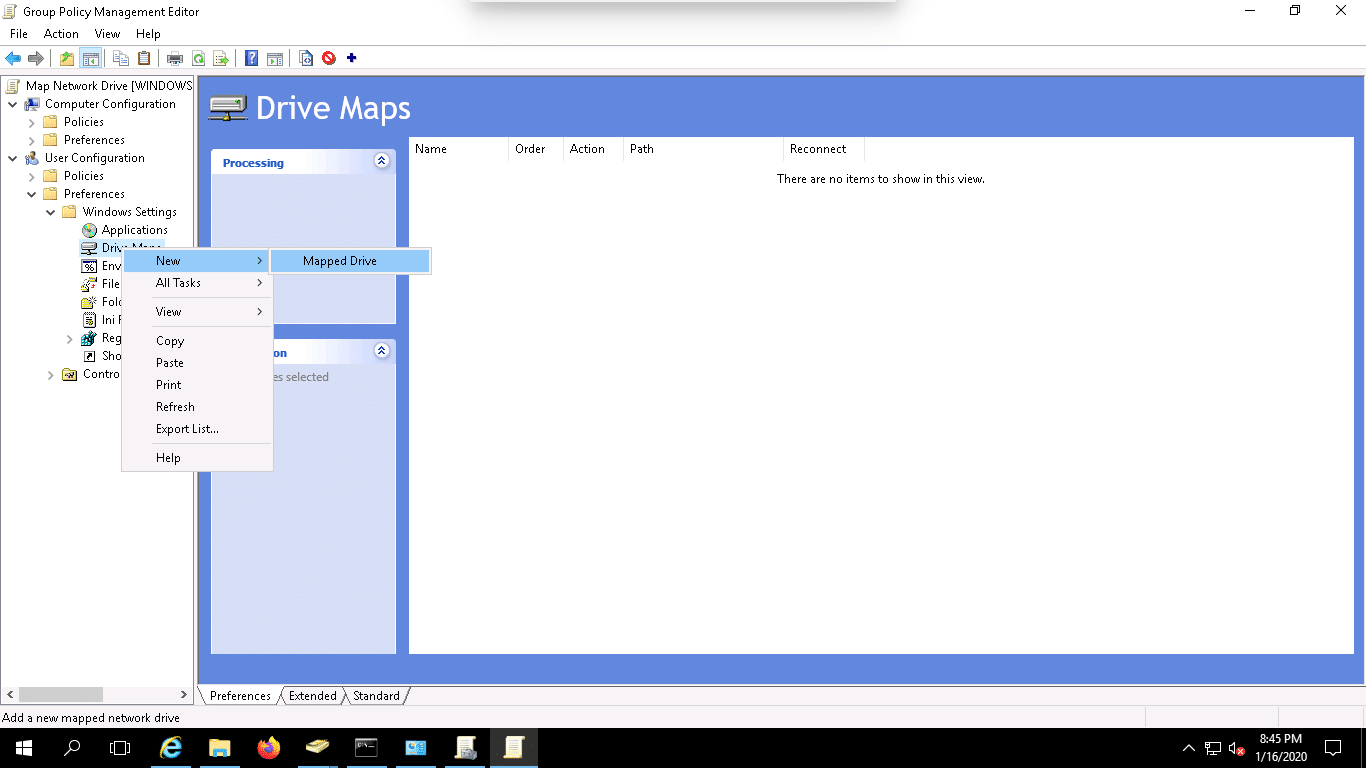
5. Next, navigate to User Configuration => Preferences => Windows Settings and right click on the Drive Maps => New => Mapped Drive as shown below:
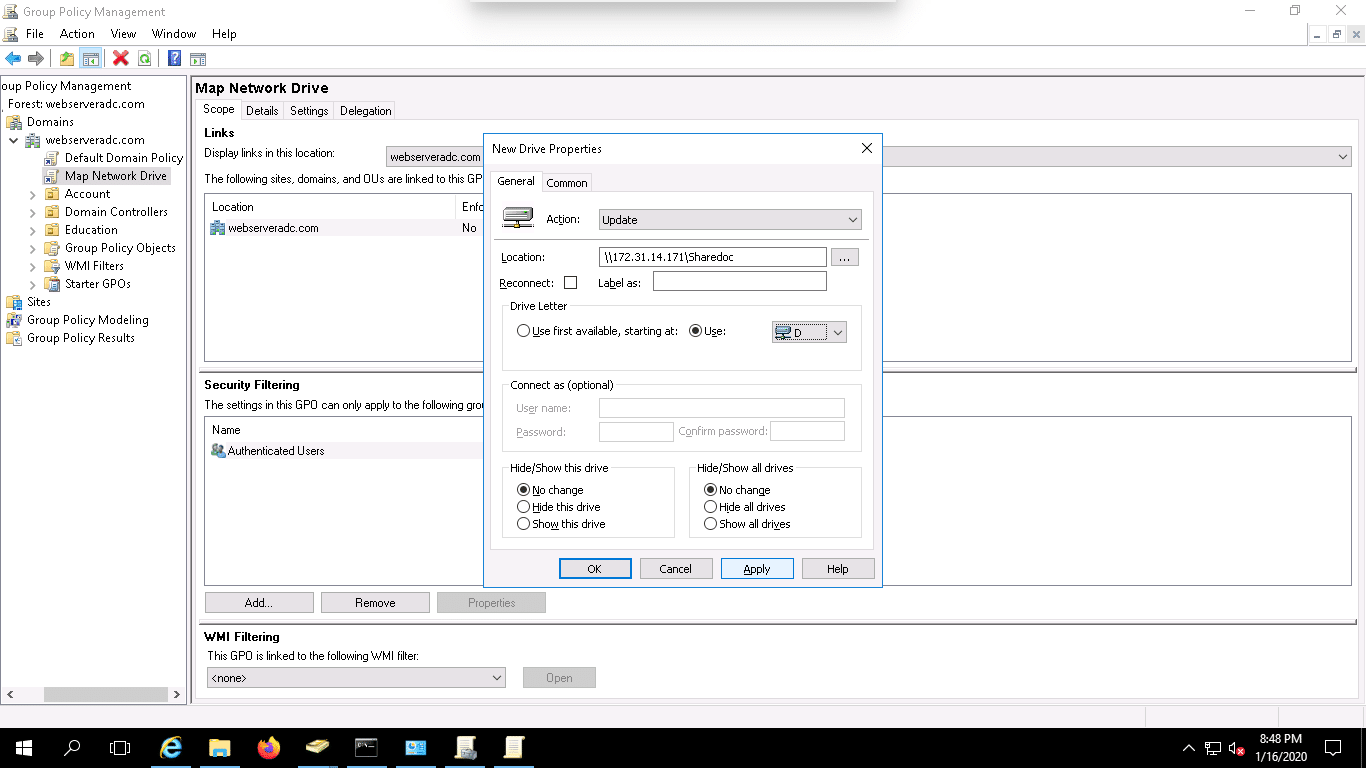
6. Next, provide the path of your network share folder, Choose Update in Action, Select drive letter as shown below:
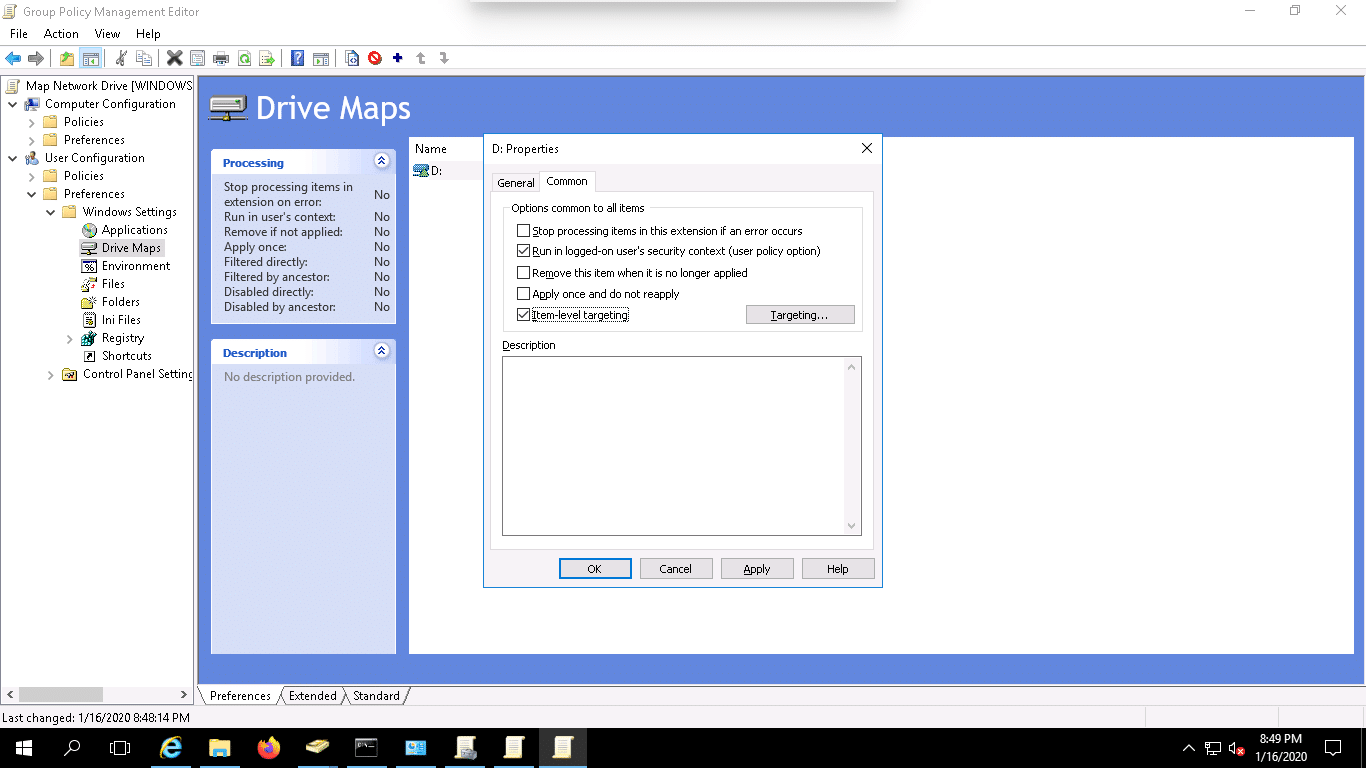
7. Next, in the Common tab, Select “Run in logged on users’s security context”, Select Item-level Targeting and click on the Targeting Button as shown below:
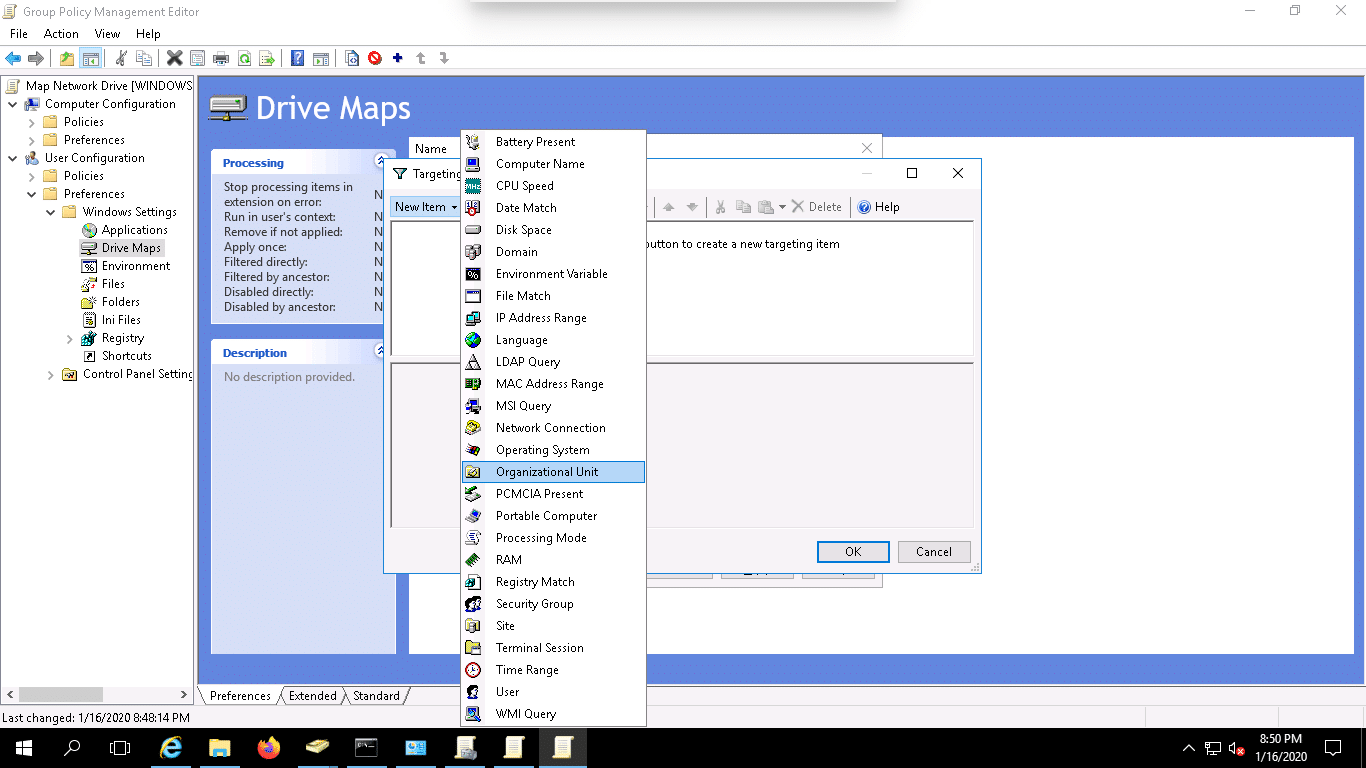
8. Next, select New Item => Select Organization Unit => Select Education OU as shown below:
9. Next click on the OK button, again click on the OK button to save the GPO settings.
Once the GPO setup has been completed, you will need to restart your system to update the GPO settings.
After restarting the system, login with a user from the Education department user and go to file explorer. You should see your mapped network drive in the following screen:
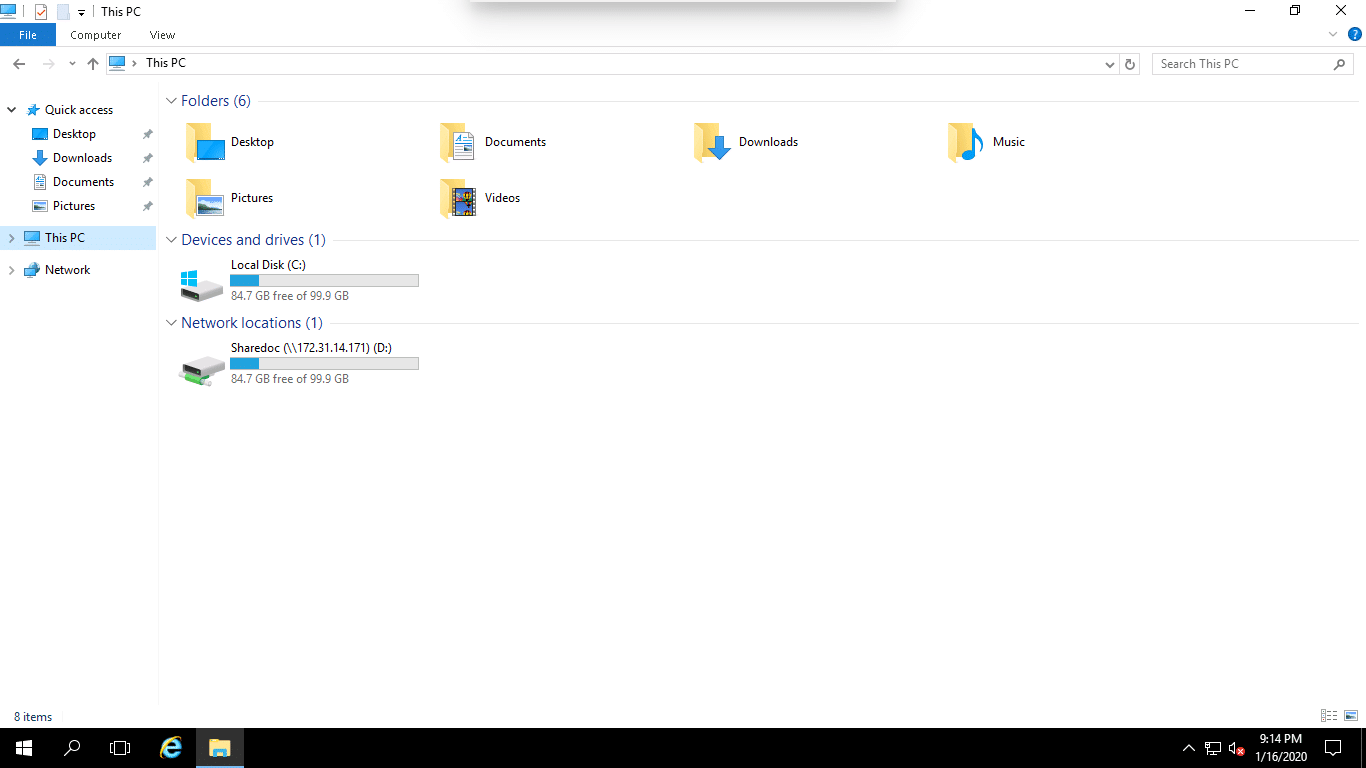
Now, every user from Education OU will get this network drive.
Map a Network Drive for Individual Users with Group Policy
In section, we will learn how to map a network drive for individual users so that each user can get their own folder to save files.
To do so, you will need to create a folder on the file server that matches the user’s login name.
For the purpose of this tutorial, we will create three folders on the file server as shown below:
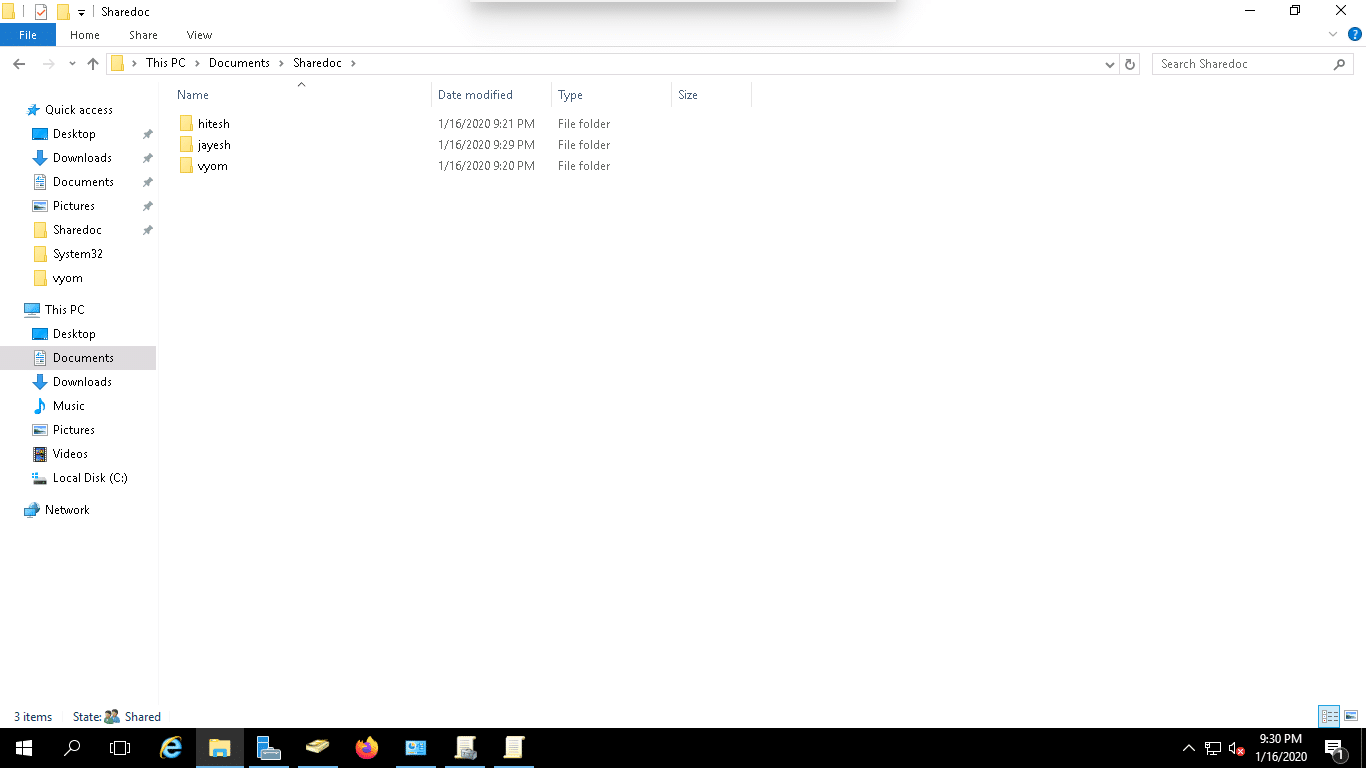
You can follow the below steps to map a network drive for the user jayesh with Group Policy:
1. Open the Group Policy Management Console.
2. Right click on the webserveradc.com domain and click on the “Create a GPO in this domain, and link it here” as shown below:
3. Provide the name of your New GPO and click on the OK button to create the GPO.
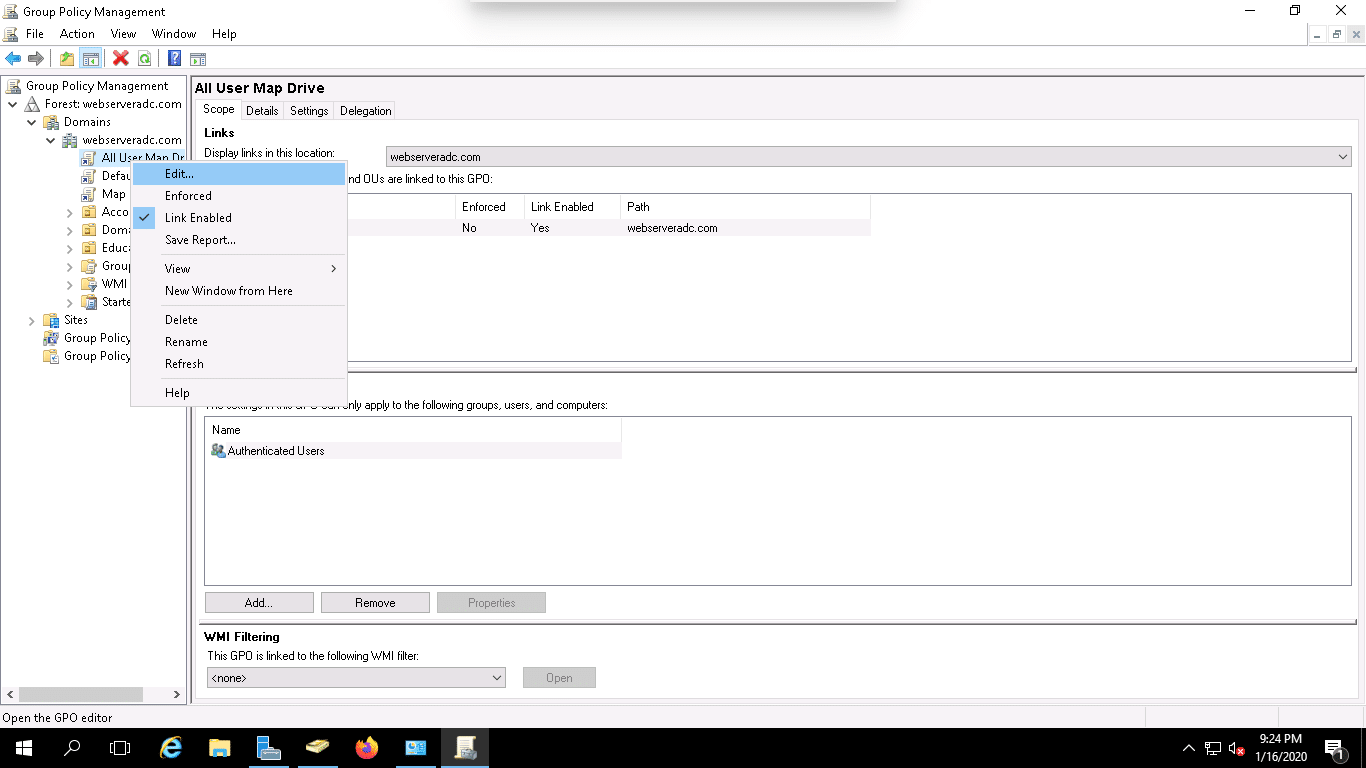
4. After creating New GPO, right click on the All User Map Drive GPO and click on the Edit button as shown below:
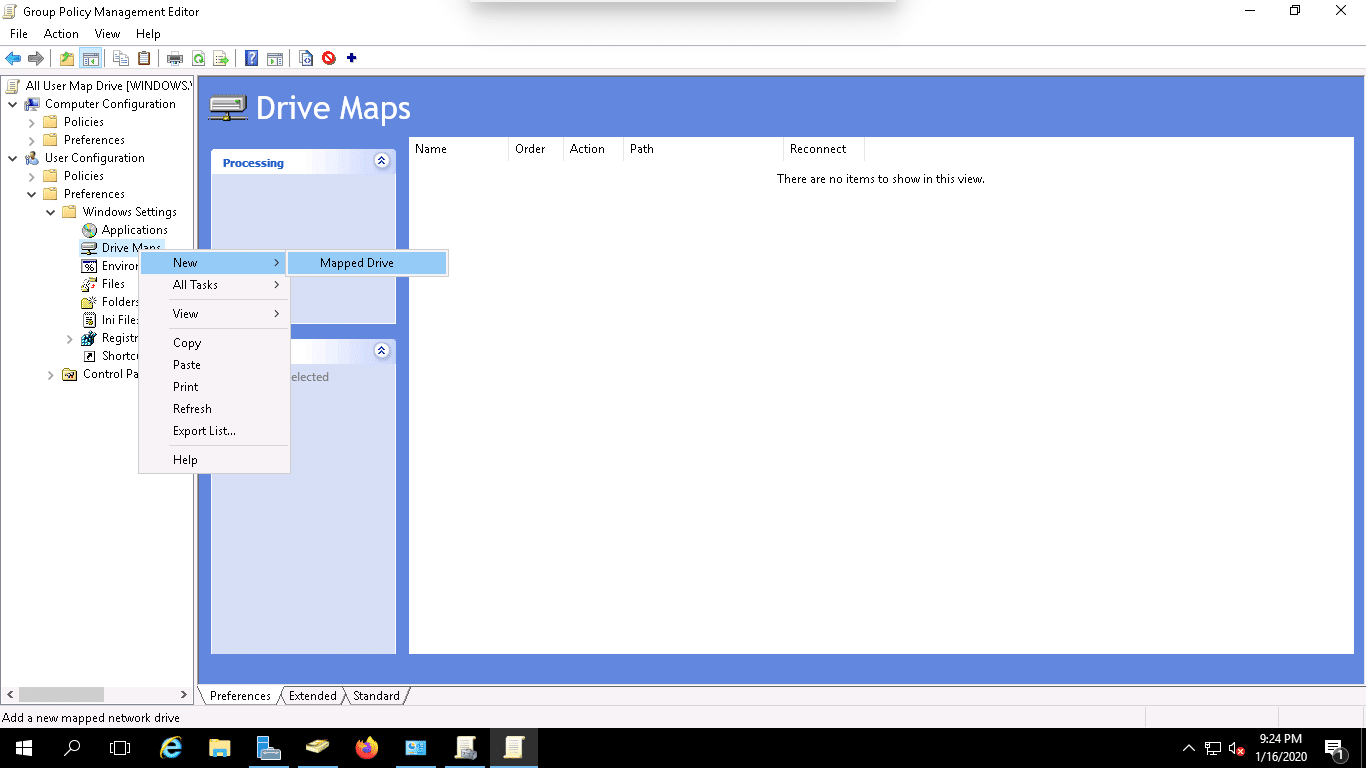
5. Next, navigate to User Configuration => Preferences => Windows Settings and right click on the Drive Maps => New => Mapped Drive as shown below:
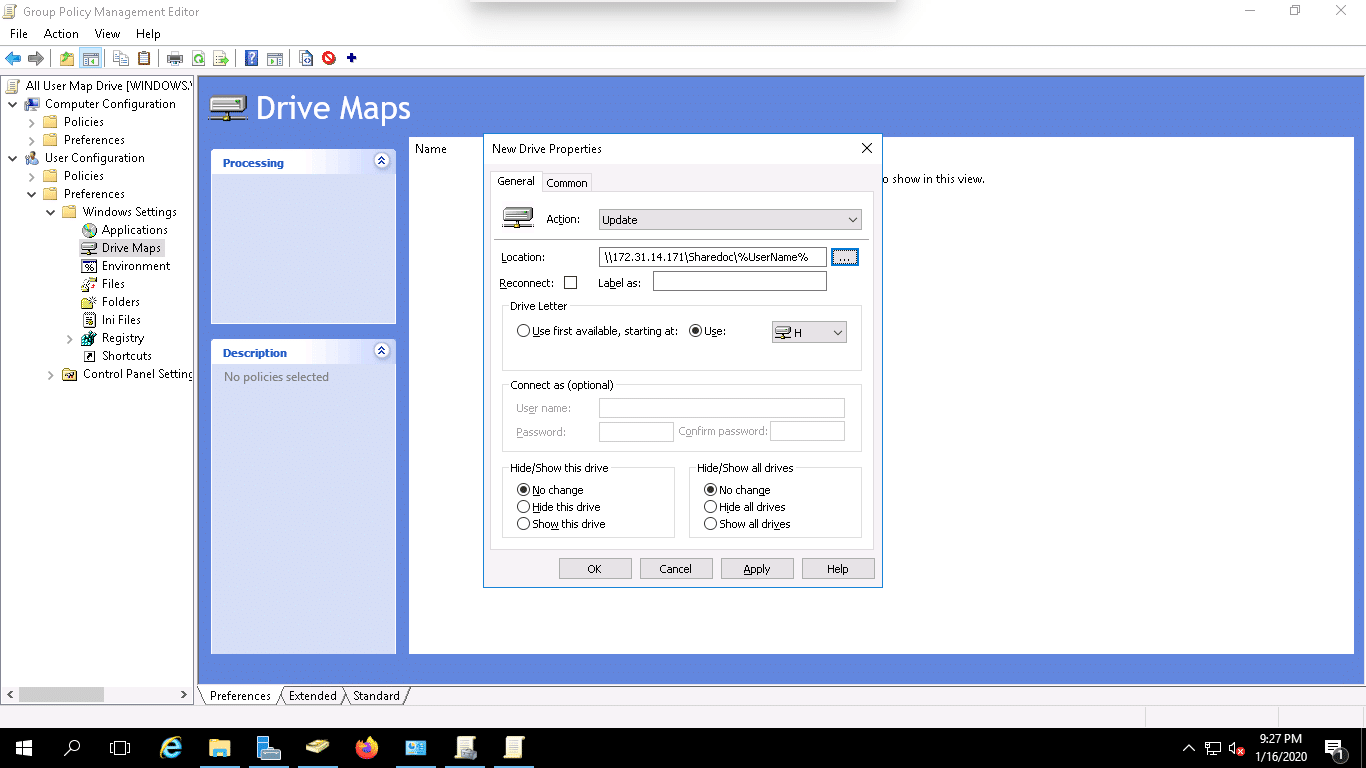
6. Next, provide your file server path, %UserName% as a variable that will match the user’s logon name, Choose Update in Action, Select drive letter as shown below:
7. Next click on the OK button to save the GPO settings.
Once the GPO setup has been completed, you will need to restart your system to update the GPO settings.
After restarting the system, login with the user jayesh and go to File Explorer.
You should see your mapped network drive in the following screen:

Conclusion
Congratulations!
You have successfully mapped a network drive from the network file server to your local system.
You can now set up your own Group Policy to map a network drive as per your infrastructure requirements without any user interaction at all!