
RSYNC also known as “Remote sync” is a powerful tool used to transfer and synchronization of data between both local and remote systems.
Rsync uses a “delta transfer algorithm” which means it will only sync the portions of files that have changed from source to destination.
It is a very useful tool for Linux system administrators to manage the day to day backup and restoration activities. Rsync has several options to preserve filesystem permissions and compress the data during transfers.
In this tutorial, we will show you how to use Rsync for local and remote file synchronization through practical examples.
Install Rsync
By default, Rsync is available in the most Linux-based operating systems. You can install it by running the following command:
apt-get install rsync -y
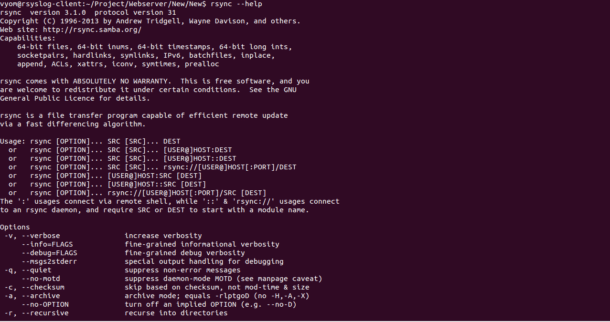
Once installed, you can list all the options available with rsync command using the following command:
rsync --help
You should see the following screen:
Basic Syntax
Basic syntax of Rsync is shown below:
Local to Local
rsync [OPTION] [SRC] [DEST]
Local to Remote
rsync [OPTION] [SRC] USER@IP:DEST
Remote to Local
rsync [OPTION] USER@IP:SRC [DEST]
Where:
- OPTION : Specify the different rsync options.
- SRC : Specify the source directory of the system.
- DEST : Specify the destination directory of the system.
- USER : Specify the username of the remote system.
- IP : Specify the IP address of the remote system.
Some of the most common options used with rsync command are shown below:
- -v : This option provides verbose output.
- -a : This option allows you to copy files recursively and preserves symbolic links, file permissions, user & group ownerships and timestamps.
- -r : This option copy files recursively but doesn’t preserve symbolic links, file permissions, user & group ownerships and timestamps.
- -h : This option show output in a human-readable format.
- -z : This option compresses files and folders during the transfer.
- -P : This option is used to show a progress bar during the data transfer.
Sync Files and Directory Locally
In this section, we will show you how to sync files and directory from one location to other location locally.
Sync Files Locally
In the following example, we will copy a file named file1.txt from /opt to /mnt directory:
rsync -av /opt/file1.txt /mnt/
You should see the following output:
sending incremental file list

file1.txt

sent 127 bytes  received 35 bytes  324.00 bytes/sec

total size is 32  speedup is 0.20

Sync Directory Locally
In the following example, we will create a directory named source and destination, create some files inside the source directory then sync the source directory with destination directory.
First, create the required directory and files with the following command:
mkdir source destination

touch source/{1..6}
Next, sync the source directory with the destination directory as shown below:
rsync -avr source destination
You should see the following output:
sending incremental file list

source/

source/1

source/2

source/3

source/4

source/5

source/6

sent 377 bytes  received 134 bytes  1,022.00 bytes/sec

total size is 0  speedup is 0.00

** Please Remember the Following:
- If the destination directory is not available Rsync will create it automatically.
- If we add a trailing slash / at the end of the source directory then it will copy only the contents of the source directory to the destination directory.
Sync Directory From/To Local System
In this section, we will learn how to transfer the files and directories from a local system to remote system and remote system to local system.
Sync Directory From Local System To Remote System
You can also transfer the files and directories from a local system to remote system with Rsync.
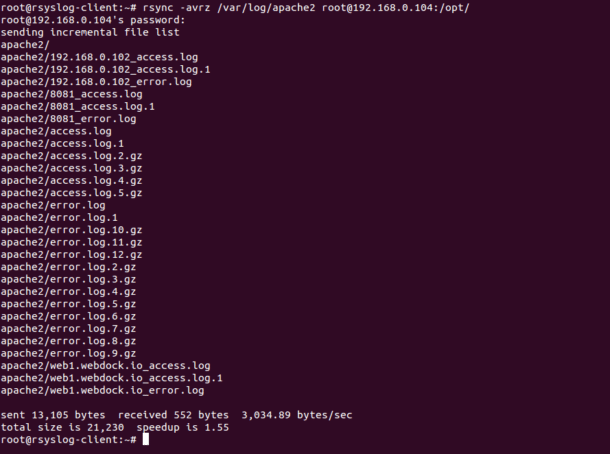
Run the following command to transfer the local directory named /var/log/apache2 to the remote system directory /opt:
rsync -avrz /var/log/apache2 root@192.168.0.104:/opt/
You will be asked to provide a remote system user’s password.
Provide your password and hit Enter to sync the directory as shown below:
root@192.168.0.104's password:

sending incremental file list

apache2/

apache2/192.168.0.102_access.log

apache2/192.168.0.102_access.log.1

apache2/192.168.0.102_error.log

apache2/8081_access.log

apache2/8081_access.log.1

apache2/8081_error.log

apache2/access.log

apache2/access.log.1

apache2/access.log.2.gz

apache2/access.log.3.gz

apache2/access.log.4.gz

apache2/access.log.5.gz

apache2/error.log

apache2/error.log.1

apache2/error.log.10.gz

apache2/error.log.11.gz

apache2/error.log.12.gz

apache2/error.log.2.gz

apache2/error.log.3.gz

apache2/error.log.4.gz

apache2/error.log.5.gz

apache2/error.log.6.gz

apache2/error.log.7.gz

apache2/error.log.8.gz

apache2/error.log.9.gz

apache2/web1.webdock.io_access.log

apache2/web1.webdock.io_access.log.1

apache2/web1.webdock.io_error.log

sent 13,105 bytes  received 552 bytes  3,034.89 bytes/sec

total size is 21,230  speedup is 1.55
If you want to transfer large file and display the progress bar during the transfer then you can use -P option with Rsync:
rsync -ar -P /home/vyom/Desktop/CentOS-8-x86_64-1905-boot.iso root@192.168.0.104:/opt/
You should see the following output:
root@192.168.0.104's password:

sending incremental file list

CentOS-8-x86_64-1905-boot.iso

559,939,584 100%   26.94MB/s    0:00:19 (xfr#1, to-chk=0/1)

Sync Directory From Remote System To Local System
You can also transfer the files and directories from a remote system to local system with Rsync.
Run the following command to transfer the remote directory named /var/log/nginx to the local system directory /opt:
rsync -avrz root@192.168.0.104:/var/log/nginx /opt/
You should see the following output:
root@192.168.0.104's password:

receiving incremental file list

nginx/

nginx/access.log

nginx/access.log.1

nginx/access.log.2.gz

nginx/access.log.3.gz

nginx/access.log.4.gz

nginx/error.log

nginx/error.log.1

nginx/error.log.2.gz

nginx/error.log.3.gz

nginx/error.log.4.gz

nginx/error.log.5.gz

nginx/error.log.6.gz

nginx/error.log.7.gz

sent 275 bytes  received 4,690 bytes  522.63 bytes/sec

total size is 24,754  speedup is 4.99

Remove Files and Directory That Does Not Exist in Source Directory
Rsync also allows you to delete files and directories that are not available in the source directory. You can achieve this using the –delete option with Rsync.
In the following example, we will delete some files from the /var/log/apache2 directory then sync it again with remote system’s /opt directory with –delete option:
rsync -avrz --delete /var/log/apache2 root@192.168.0.104:/opt/
You should see the following output:
root@192.168.0.104's password:

sending incremental file list

deleting apache2/web1.webdock.io_error.log

deleting apache2/web1.webdock.io_access.log.1

deleting apache2/web1.webdock.io_access.log

apache2/

sent 582 bytes  received 135 bytes  110.31 bytes/sec

total size is 20,307  speedup is 28.32

Remove Source Files and Directory After Synchronization
Rsync also allows you to remove files and directories from the source system after completing the synchronization. You can achieve this using the –remove-source-files option with Rsync:
rsync -avrz --remove-source-files /var/log/apache2 root@192.168.0.104:/opt/
You should see the following output:
root@192.168.0.104's password:

sending incremental file list

apache2/

apache2/192.168.0.102_access.log

apache2/192.168.0.102_access.log.1

apache2/192.168.0.102_error.log

apache2/access.log

apache2/access.log.1

apache2/access.log.2.gz

apache2/access.log.3.gz

apache2/access.log.4.gz

apache2/access.log.5.gz

apache2/error.log

apache2/error.log.1

apache2/error.log.10.gz

apache2/error.log.11.gz

apache2/error.log.12.gz

apache2/error.log.2.gz

apache2/error.log.3.gz

apache2/error.log.4.gz

apache2/error.log.5.gz

apache2/error.log.6.gz

apache2/error.log.7.gz

apache2/error.log.8.gz

apache2/error.log.9.gz

sent 12,203 bytes  received 614 bytes  2,848.22 bytes/sec

total size is 20,307  speedup is 1.58

Exclude Files and Directories
Rsync also allows you to exclude file and directories that you don’t want to include in your sync.
You can achieve it using the –exclude option with Rsync.
For example, if you want to exclude the mods-available and mods-enabled directories from the /etc/apache2 directory run the following command:
rsync -avrz --exclude=mods-available --exclude=mods-enabled /etc/apache2 /opt/
You should see the following output:
sending incremental file list

apache2/

apache2/apache2.conf

apache2/envvars

apache2/magic

apache2/ports.conf

apache2/conf-available/

apache2/conf-available/charset.conf

apache2/conf-available/localized-error-pages.conf

apache2/conf-available/other-vhosts-access-log.conf

apache2/conf-available/security.conf

apache2/conf-available/serve-cgi-bin.conf

apache2/conf-enabled/

apache2/conf-enabled/charset.conf -> ../conf-available/charset.conf

apache2/conf-enabled/localized-error-pages.conf -> ../conf-available/localized-error-pages.conf

apache2/conf-enabled/other-vhosts-access-log.conf -> ../conf-available/other-vhosts-access-log.conf

apache2/conf-enabled/security.conf -> ../conf-available/security.conf

apache2/conf-enabled/serve-cgi-bin.conf -> ../conf-available/serve-cgi-bin.conf

apache2/sites-available/

apache2/sites-available/000-default.conf

apache2/sites-available/8081.conf

apache2/sites-available/default-ssl.conf

apache2/sites-available/test.conf

apache2/sites-available/web1.webdock.io.conf

apache2/sites-enabled/

apache2/sites-enabled/000-default.conf

apache2/sites-enabled/8081.conf -> ../sites-available/8081.conf

sent 22,269 bytes  received 347 bytes  45,232.00 bytes/sec

total size is 56,203  speedup is 2.49

Conclusion
As you see, we’ve learned how to Sync local and remote files and directories through different examples. We hope this has been informational and you’ve learned how to transfer and synchronize directories and files using the Rsync utility, as well as do full and incremental backups of your data if needed with RSYNC!