OpenSSH is an open-source version of the Secure Shell (SSH) protocol that can be used to login remotely to a server and to control remote Linux-based systems.
OpenSSH provides secure encrypted communication between two untrusted hosts over an insecure network.
OpenSSH also provides sftp and sftp-server that implement an easier solution for file-transfer and is used in major network monitoring tools and web servers all around the world.
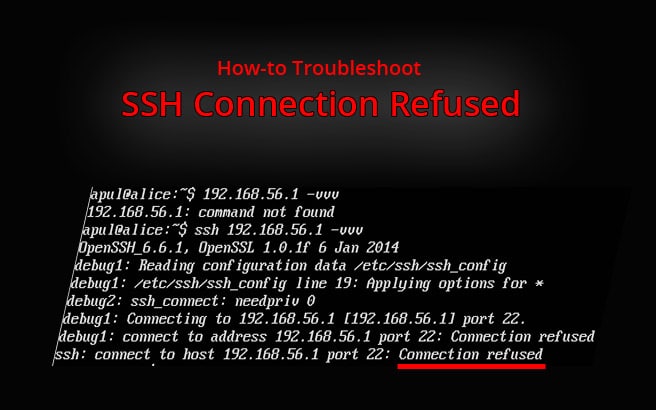
In this tutorial, we will show you how to troubleshoot “the SSH Connection Refused” error while connecting to Ubuntu/Linux.
Connecting to a Server Via SSH
There are two ways to connect to a server via SSH. You can either use SSH command or Putty (or any other SSH Client for that matter) to connect a server.
Connect to a Server with SSH command
The basic syntax of the SSH command is shown below:
ssh Username@Server-ip-address -p Port
Where:
- Username : user account on your server.
- Server-ip-address : IP address or Domain name of your server.
- Port : It is the port number of the OpenSSH server, usually 22, unless you’ve changed it.
For example, let’s connect a remote server with username vyom, IP address 192.168.0.102 and Port number 22:
ssh vyom@192.168.0.102 -p 22
When your connecting your server via SSH for the first time, you should see the following message:
The authenticity of host '192.168.0.102 (192.168.0.102)' can't be established.

ECDSA key fingerprint is f7:9c:72:63:33:ac:d6:49:26:9c:af:c6:ff:11:27:01.

Are you sure you want to continue connecting (yes/no)? yes
Type yes and hit Enter, you will be asked to provide a password for user vyom. Provide a password and hit Enter to connect to a server. You should see the following output:
Welcome to Ubuntu 14.04.6 LTS (GNU/Linux 3.19.0-80-generic x86_64)

* Documentation:  https://help.ubuntu.com/

Last login: Fri Nov  1 11:36:07 2019 from 192.168.0.102
You should see the above output in the following screen:
Connect a Server with Putty
Putty is open source SSH client software used to connect SSH server from Windows-based operating systems. You can download the Putty software from the Putty download page.
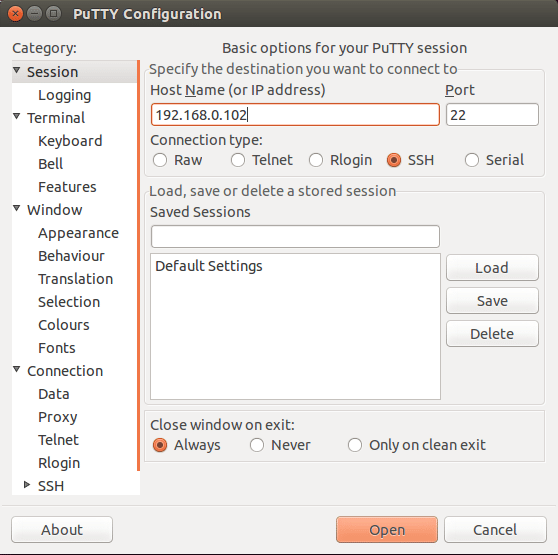
Once downloaded, double-click on the putty.exe program to launch the application. You should see the following screen:
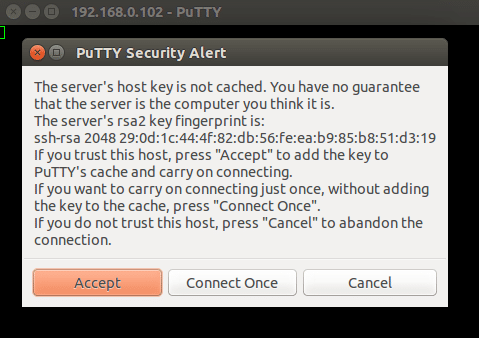
Now, provide your SSH server IP-address, Port number, Connection type and click on the Open button to start the SSH session. If you are connecting to this server first time. You should see the following screen:
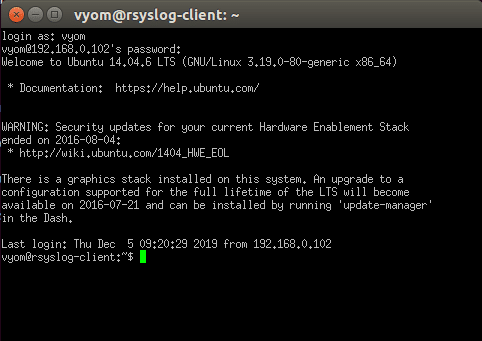
Click on the Accept button. You should see a terminal prompt asking for your username.
Provide your username, password and hit Enter to logged into your server.
Troubleshoot SSH Connection Refused
Sometimes you receive an error like “Network error: Connection refused” while connecting to your server via SSH. There are a number of reasons for this error. In order to fix this error, you will need to identify the cause of the error by checking and ruling out each possibility. In this section, we will show you some troubleshooting steps to resolve this error.
Step 1
First, make sure the openssh-server package is installed on your server.
You can check it with the following command:
dpkg -l | grep openssh-server
If the openssh-server is installed, you should see the following output:
ii openssh-server 1:6.6p1-2ubuntu2.13 amd64 secure shell (SSH) server, for secure access from remote machines
If not installed, you can install it with the following command:
apt-get install openssh-server
Step 2
OpenSSH service uses sshd daemon to listen to the incoming connections and handles user authentication. If this service crashes, the connection fails and you will get the SSH Connection refused error.
You can check the status of OpenSSH service whether it is running or not with the following command:
/etc/init.d/ssh status
If it is running, you should see the following output:
ssh start/running, process 5476
You can also check the SSH service with the following command:
ps -ef | grep ssh
You should see the following output:
vyom      4651  4407  0 09:19 pts/0    00:00:00 ssh vyom@192.168.0.102 -p 22

root      4652     1  0 09:19 ?        00:00:00 sshd: vyom [priv]

vyom      4782  4652  0 09:20 ?        00:00:00 sshd: vyom@pts/18

root      5167     1  0 09:32 ?        00:00:00 sshd: vyom [priv]

vyom      5229  5167  0 09:33 ?        00:00:00 sshd: vyom@pts/27

root      5476     1  0 09:46 ?        00:00:00 /usr/sbin/sshd -D

vyom      5532  3678  0 09:50 pts/15   00:00:00 nano New/New/SSH/ssh

root      5584  5410  0 09:54 pts/18   00:00:00 grep --color=auto ssh
If an OpenSSH service is not running, you can start it with the following command:
/etc/init.d/ssh start
You should see the output of the above commands in the following screen:
Step 3
By default, OpenSSH is running on port 22 and is vulnerable to attack. Sometimes you’ll get the “Network error: Connection refused” error if your SSH server is listening on a different port.
First, you will need to find the open ports in your server with Nmap command:
nmap 192.168.0.102
You should see the following output:
Starting Nmap 6.40 ( http://nmap.org ) at 2019-12-05 10:03 IST

Nmap scan report for 192.168.0.102

Host is up (0.00016s latency).

Not shown: 998 closed ports

PORT     STATE SERVICE

2200/tcp open  ici

7070/tcp open  realserver

Nmap done: 1 IP address (1 host up) scanned in 2.09 seconds
In the above output, you should see that port 2200 and 7070 are open on your server.
Now, check which service is running on the given ports (2200, 7070) one by one:
nc -v -nn 192.168.0.102 2200
You should see that SSH service is running on port 2200:
Connection to 192.168.0.102 2200 port [tcp/*] succeeded!

SSH-2.0-OpenSSH_6.6.1p1 Ubuntu-2ubuntu2.13
You can also check the OpenSSH listening port by opening the file:
/etc/ssh/sshd_config
You should now be able to connect to your OpenSSH server using the port 2200 as shown below:
ssh vyom@192.168.0.102 -p 2200
You should see the output of all the commands in the following screen:
Step 4
Some times you will get the “Network error: Connection refused” error, if your OpenSSH server IP address is conflict with other systems in your network.
You can use arp-scan tool to check the duplicate IP address in your network as shown below:
arp-scan 192.168.0.0/24
You should see the following output:
Interface: enp0s3, datalink type: EN10MB (Ethernet)

Starting arp-scan 1.9 with 256 hosts (http://www.nta-monitor.com/tools/arp-scan/)

192.168.0.1     c8:3a:35:59:49:b0       Tenda Technology Co., Ltd.

192.168.0.102   4c:bb:58:9c:f5:55       (Unknown)

192.168.0.103   4c:bb:58:9c:f5:55       (Unknown)

192.168.0.104   4c:bb:58:9c:f5:55       (Unknown)

192.168.0.102   98:74:da:e5:6b:55       (Unknown) (DUP: 2)

10 packets received by filter, 0 packets dropped by kernel

Ending arp-scan 1.9: 256 hosts scanned in 2.082 seconds (122.96 hosts/sec). 6 responded
To resolve this error, you will need to change your server’s IP address.
Step 5
Similarly, SSH connectivity problems may occur due to improper firewall configurations. If a firewall is configured to deny SSH connection on your server, the connectivity can fail and lead to the error SSH connection refused.
You can check whether your server is filtered with a firewall or not with the following command:
nmap 192.168.0.102
You should see that your server is filtered with a firewall:
Starting Nmap 6.40 ( http://nmap.org ) at 2019-12-05 10:14 IST

Nmap scan report for 192.168.0.102

Host is up (0.0012s latency).

All 1000 scanned ports on 192.168.0.102 are filtered

MAC Address: 08:00:27:29:E9:91 (Cadmus Computer Systems)

Nmap done: 1 IP address (1 host up) scanned in 23.57 seconds
To resolve this error, you will need to allow your SSH port through the firewall on your server.
Conclusion
In the above article, we learned how to troubleshoot the “SSH connection refused” error with several examples. I hope you have now enough knowledge to resolve this type of error.


