If you are using file servers to store and share the data among multiple users then auditing is very important for data security. Windows file system auditing is a very useful tool that allows you to track and monitor who accesses and reads files. File analysis log will help you to find what data an attacker tried to access and steal.
In this tutorial, we will show you how to enable Windows file system auditing and track the files.
Enable Audit Policy
You can enable the audit policy on the domain or local system. In this section, we will show you how to enable the audit policy on the local system.
Follow the below steps to enable the audit policy.
Step 1 : Press Windows + R and type gpedit.msc in the Run dialog box as shown below:

Step 2 : Click on the OK button to launch the local group policy editor:
Step 3 : In the left pane, navigate to “Computer Configuration => “Windows Settings” => “Security Settings” => “Local Policies” => “Audit Policy”. You should see all available policies in the right pane:

Step 4 : Double-click “Audit object access” policy to open its “Properties” as shown below:

Step 5 : Select “Success” and “Failure” check box then click on the Apply and OK button to close the window.
Step 6 : Next, update the Group policy settings by running the “Gpupdate /force” command in run as windows:

Apply Audit Policy on File and Folder that You want to Track
Next, you will need to apply audit policy on file or folder that you want to track. Follow the below steps to apply the audit policy:
Step 1 : Open “Windows Explorer” and navigate to the file or folder that you want to audit.
Step 2 : Right-click on the folder and select “Properties” from the context menu. The file’s properties window appears on the screen.
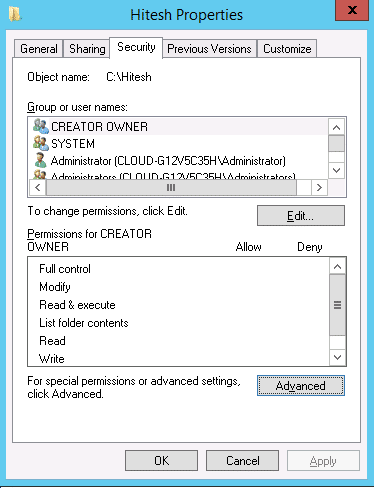
Step 3 : On the Security tab click on the Advanced. You should see the following screen:

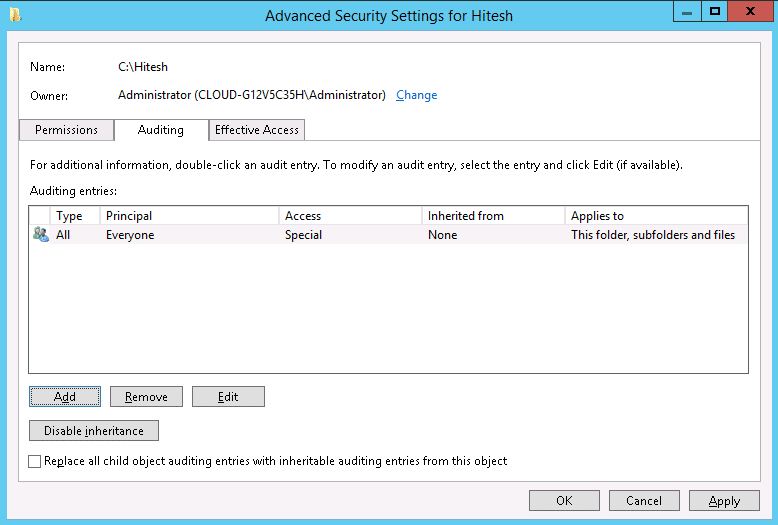
Step 4 : On the Auditing tab click on the Continue. You should see the following screen:
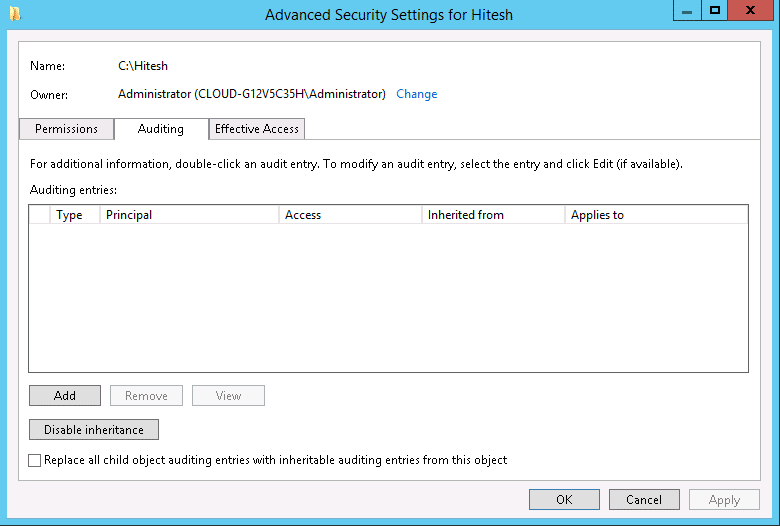
Step 5 : Now, you will need to add a new audit policy. Click on the Add button. You should see the following screen:

Step 6 : Click on the select a principal. You should see the following screen:
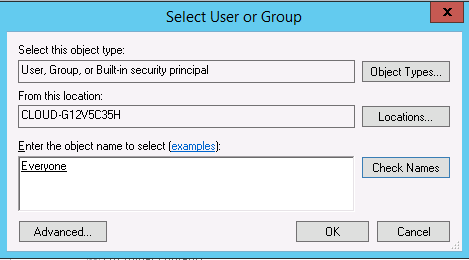
Step 7 : Add users that you want to track and click on the OK button. You should see the following screen:
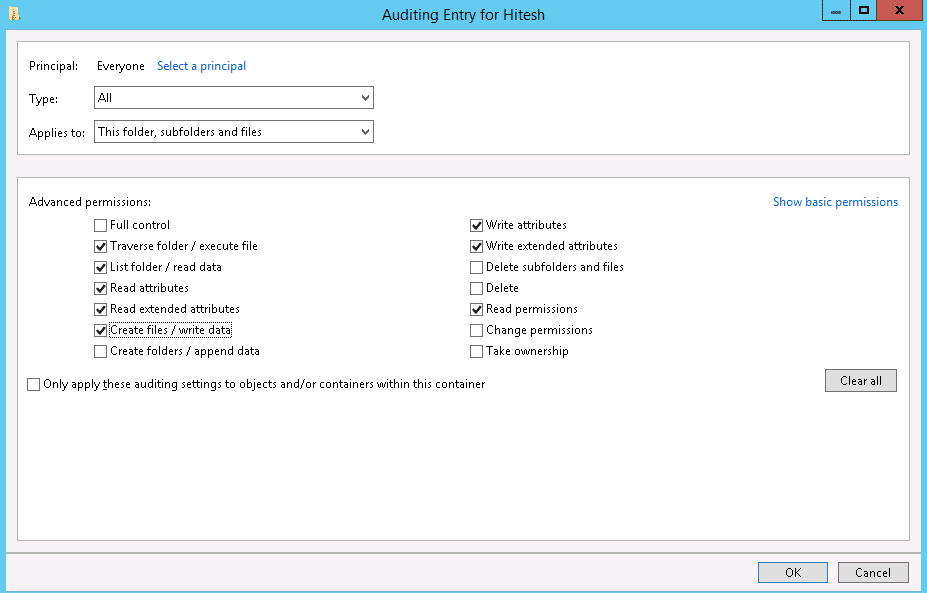
Step 8 : Select All in Type field, select “This folders, subfolders and files” in Applies to the field then select appropriate permissions and click on the OK button to close “Auditing Entry for File Access auditing” window.
Step 9 : Click “Apply” and “OK” to close the window. Click “Apply” and “OK” to close file properties.
Track Files with Windows Event Viewer
At this point, file auditing policy is set up on the folder. Now, you can track the file changes using the event viewer.
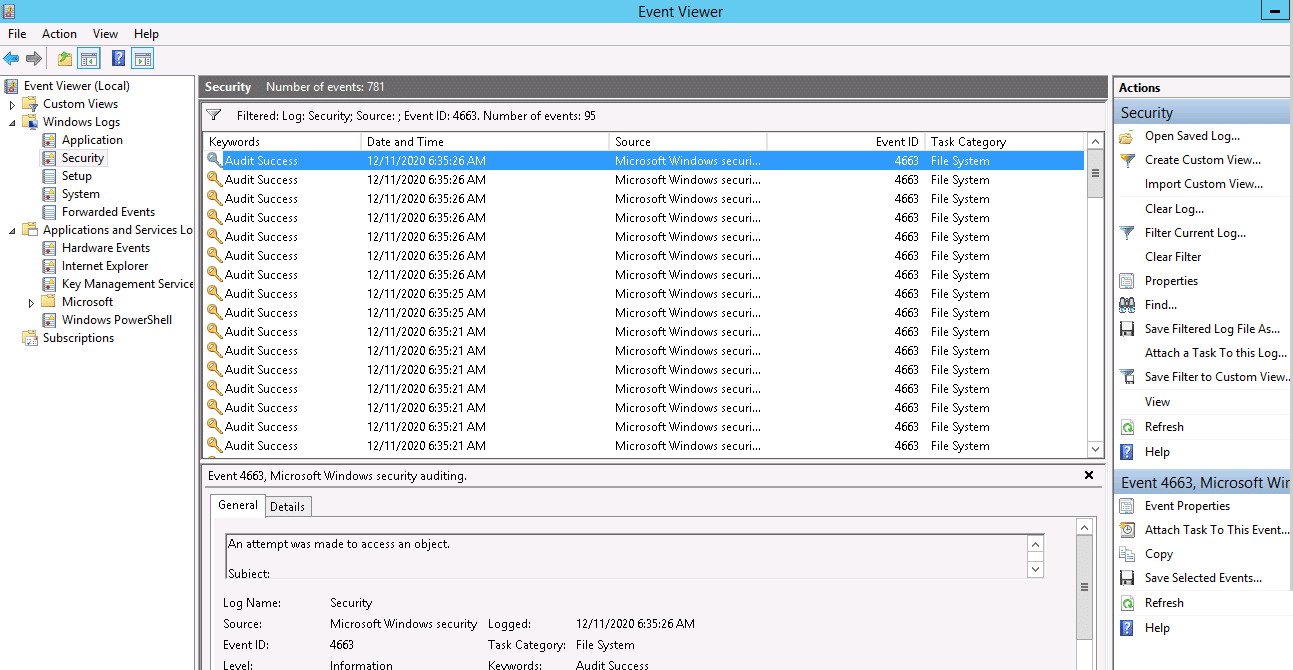
Open the Windows Event Viewer and navigate to “Windows Logs” => “Security”. You can also use the “Filter Current Log” option to find the relevant events. For example, if anyone opens the file, event ID 4663 will be logged. You can see all events ID in the following screen:
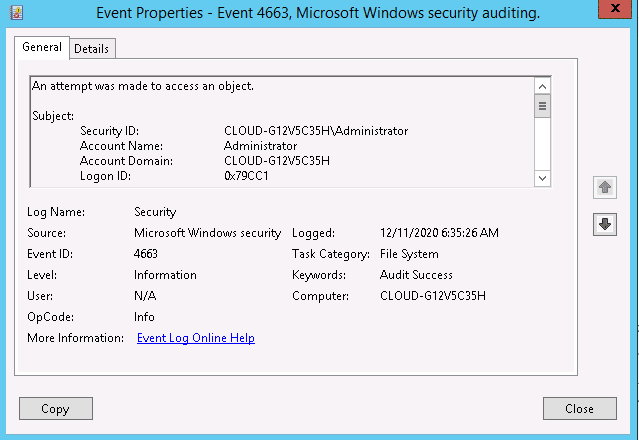
Double click on the first event, you should see the file access log in the following screen:
Use an Advanced Tool for Auditing File Sharing Permissions
You can use an advanced tool like ManageEngine ADAudit Plus to manage your NTFS and file sharing permissions. Often, when access is given to the wrong individual, it opens up the possibility for malpractice. Similarly, insider threats have a higher occurrence probability when individuals with privileged access misuse their credentials. To prevent such mishaps, this tool continuously monitors your Active Directory and NTFS to ensure that unwarranted access is not granted to anyone.

This tool continuously checks for access and changes made to NTFS permissions. In case of any suspicious changes, it immediately sends alerts to the concerned users for quick action. Also, it generates reports on the file activities of privileged users to prevent them from committing any breaches. It provides a complete audit trail as well for compliance.
Due to these features, it is a handy tool for any environment. Start a 30-day free trial to evaluate its fit for your organization.
Track and Monitor Events with Lepide File Server Auditor
You can also use Lepide File Server Auditor for auditing, reporting and alerting on file server changes and permission changes to protect data and detect threats.

Windows do not allow to organize the audited data into a readable and actionable format. Doing this manually will be a time-consuming and complex process. So it is recommended to use the special file system auditing tool like Lepide File Server Auditor.
Conclusion
In the above guide, you learned how to audit files and directories and track changes with Windows file system auditing. I hope you can now implement this solution easily on the domain controller.