PowerShell Remoting is a PowerShell feature that allows the system administrator to run commands on the remote systems.
It is built on Web Services for Management protocol and offers a reliable framework for managing computers in a network.
It is also very similar to SSH for accessing the terminal of the remote operating systems.
PowerShell Remoting is a very useful tool for the system administrator to simplify day-to-day tasks.
In this tutorial, we will show you how to enable and use the PSRemoting feature in Windows server 2016.
Enable PSRemoting on Local System
By default, the PSRemoting is Enabled on Windows Server 2012 R2 and Windows server 2016.
*Note that it is not enabled in Windows Clients such as, Windows 8, Windows 10 and in earlier versions of Windows Server.
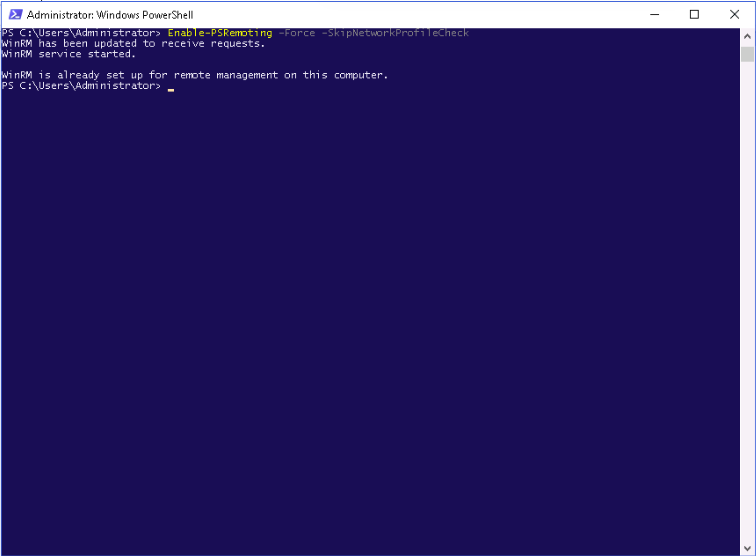
To enable the PSRemoting on Windows system, open the PowerShell interface with as an Administrative user and run the following command:
Enable-PSRemoting -Force
The above command will start the WinRM service.
Enabling it will automatically start a system reboot and creates a firewall rule to allow incoming connections.
The -Force option tells PowerShell to perform these actions without any prompt.
Note: The above command only works for non-public networks.
If your Network interface is configured on Public IP, then you can enable the PSRemote feature with the following command:
Enable-PSRemoting -SkipNetworkProfileCheck -Force
Enable PSRemoting on Workgroup System
At this point, the PSRemoting is enabled only for the Active Directory environment.
This will only allow computers that are a member of the Active Directory Domain to connect using PowerShell remoting.
If you want to enable this feature for Workgroup System or a standalone system, then you will need to add the IP address of the computer to the TrustedHosts list manually.
Run the following command to add the client computers IP to the TrustedHosts:
Set-Item WSMan:\localhost\Client\TrustedHosts -Value "192.168.0.120" -Force
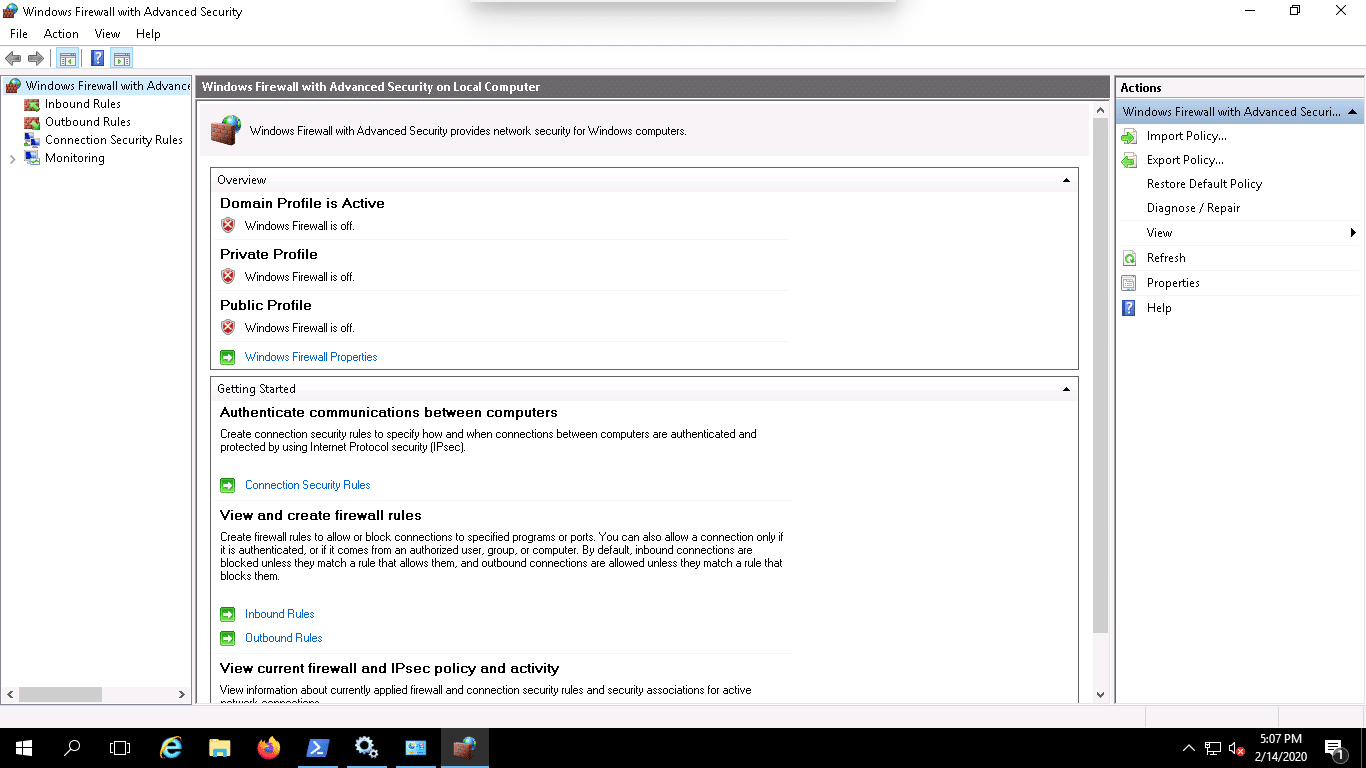
You will also need to create a new inbound rule in Windows Firewall for Windows Remote Management.
You can create these rules using the following steps:
1. Open Firewall => Advanced Settings as shown below:
2. Right-click on the Inbound rules => New rule. You should see the following page:
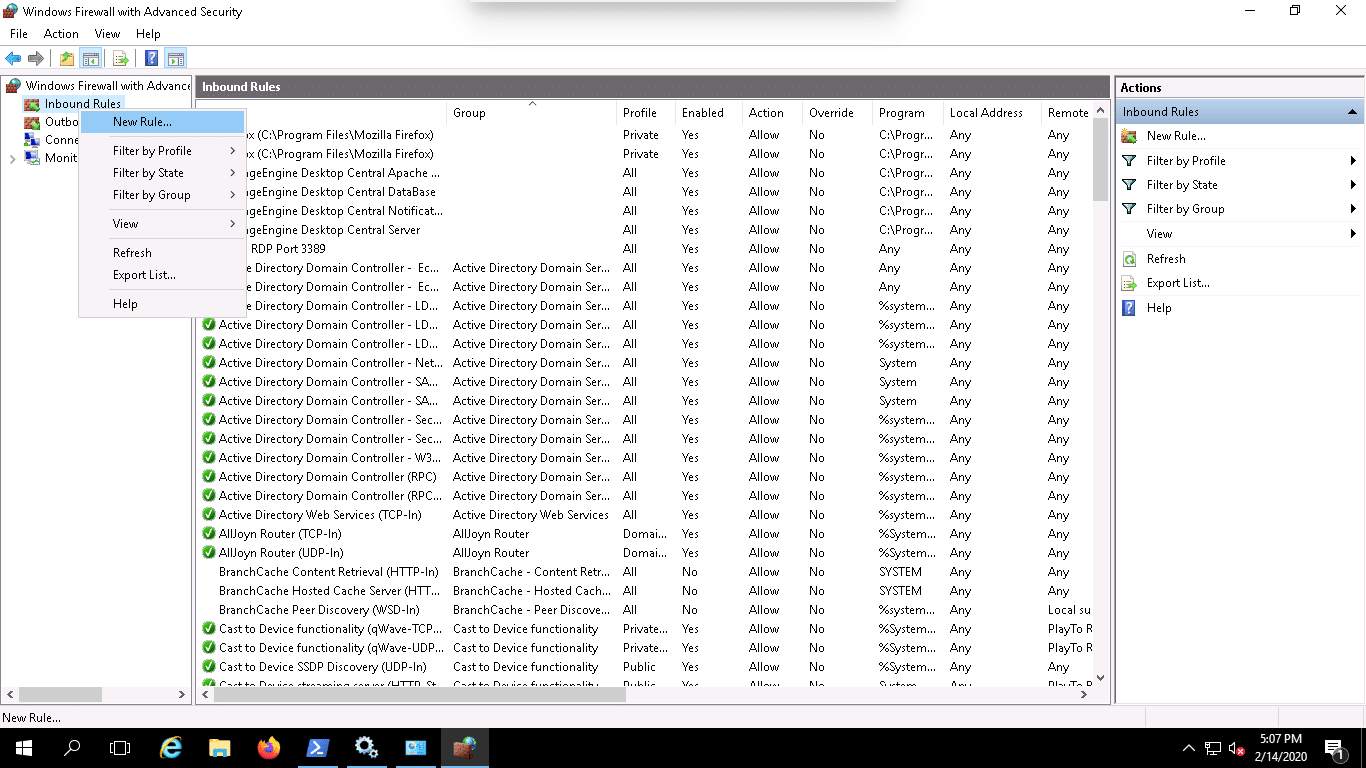
3. Select Predefined and choose Windows Remote Management as shown below:
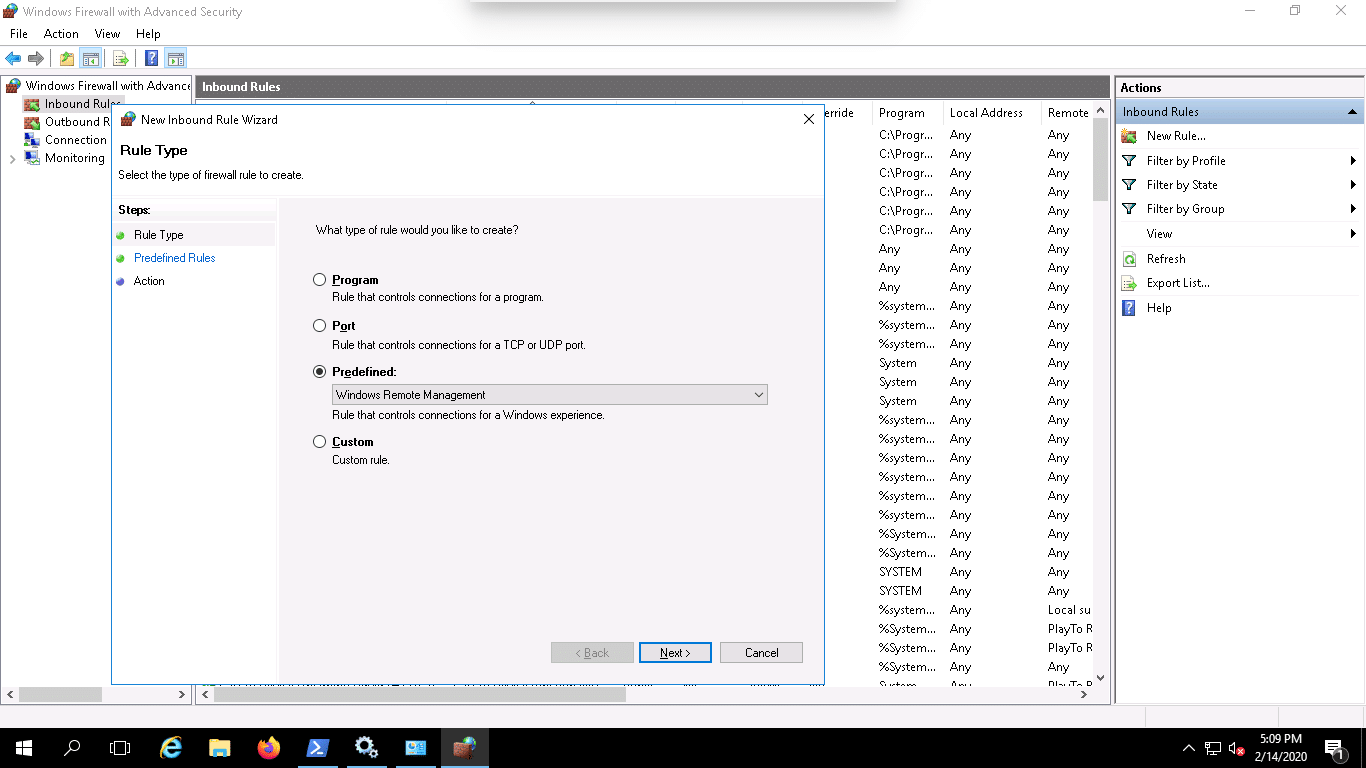
4. Click on the Next button. You should see the following page:
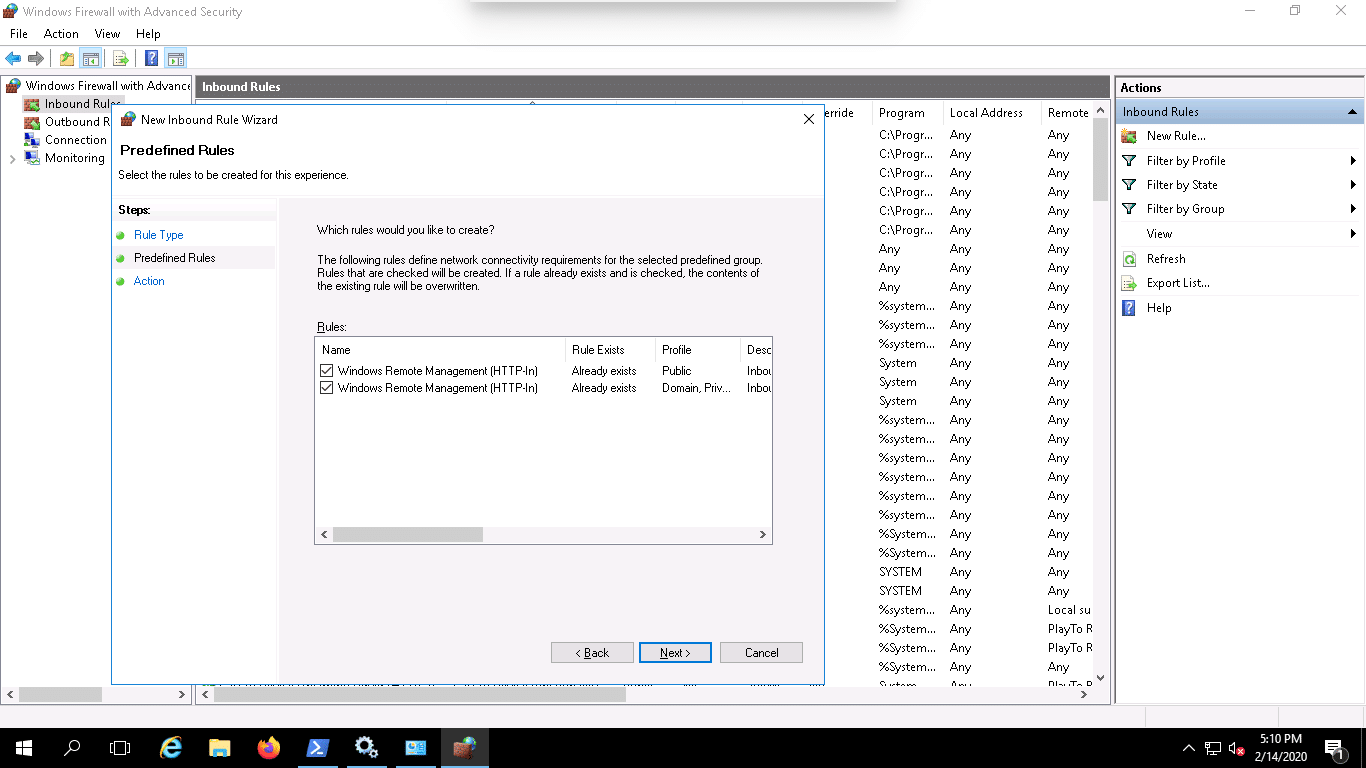
5. Select rules and click on the Next button. You should see the following page:
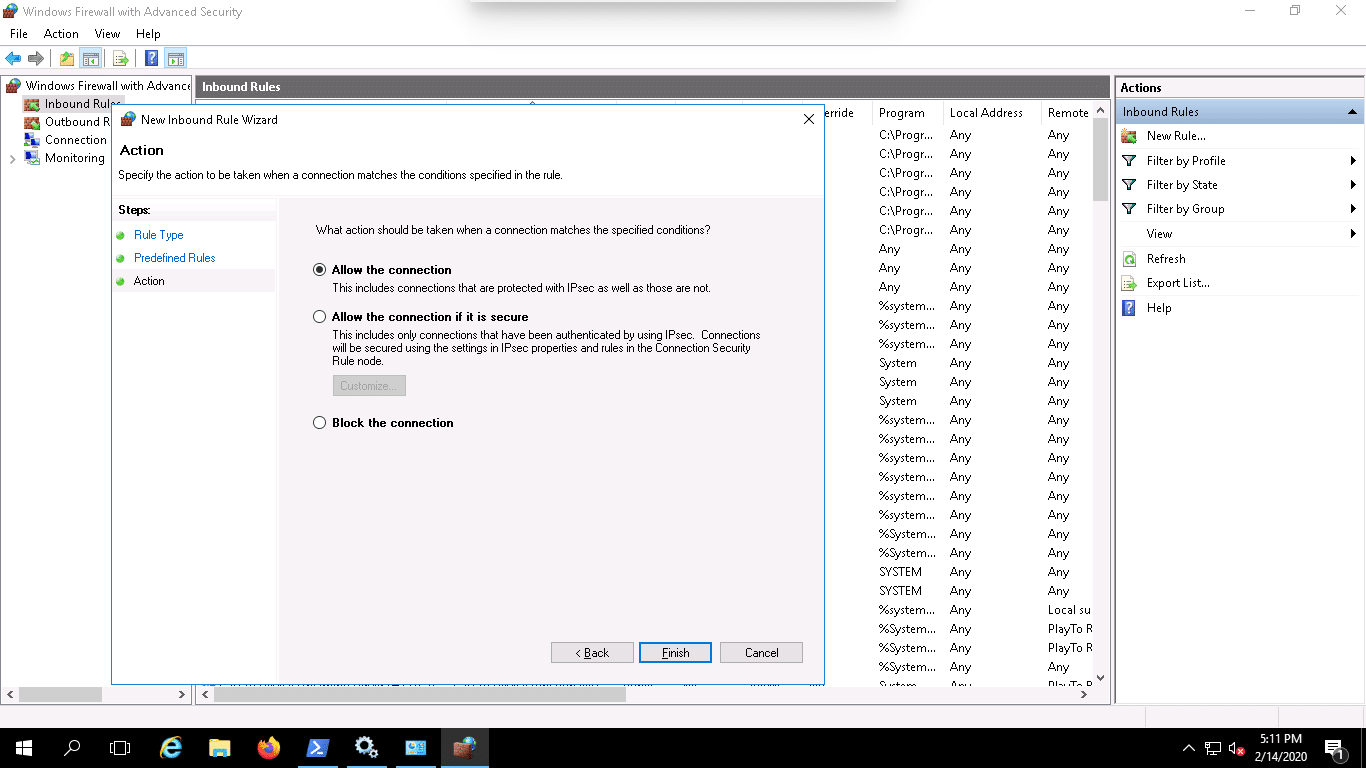
6. Select All the connection and click on the Finish button to complete the process.
Enable PSRemoting for non-administrative User
By default, only Administrative Users can connect the remote machine via PSRemote.
If you want to connect the remote machine using a normal user, then you will need to add the user account to the local Remote Management Users group.
You can follow the steps below to add a Normal User to the Remote Management Users group.
1. Open Group Policy Management Editor as shown below:
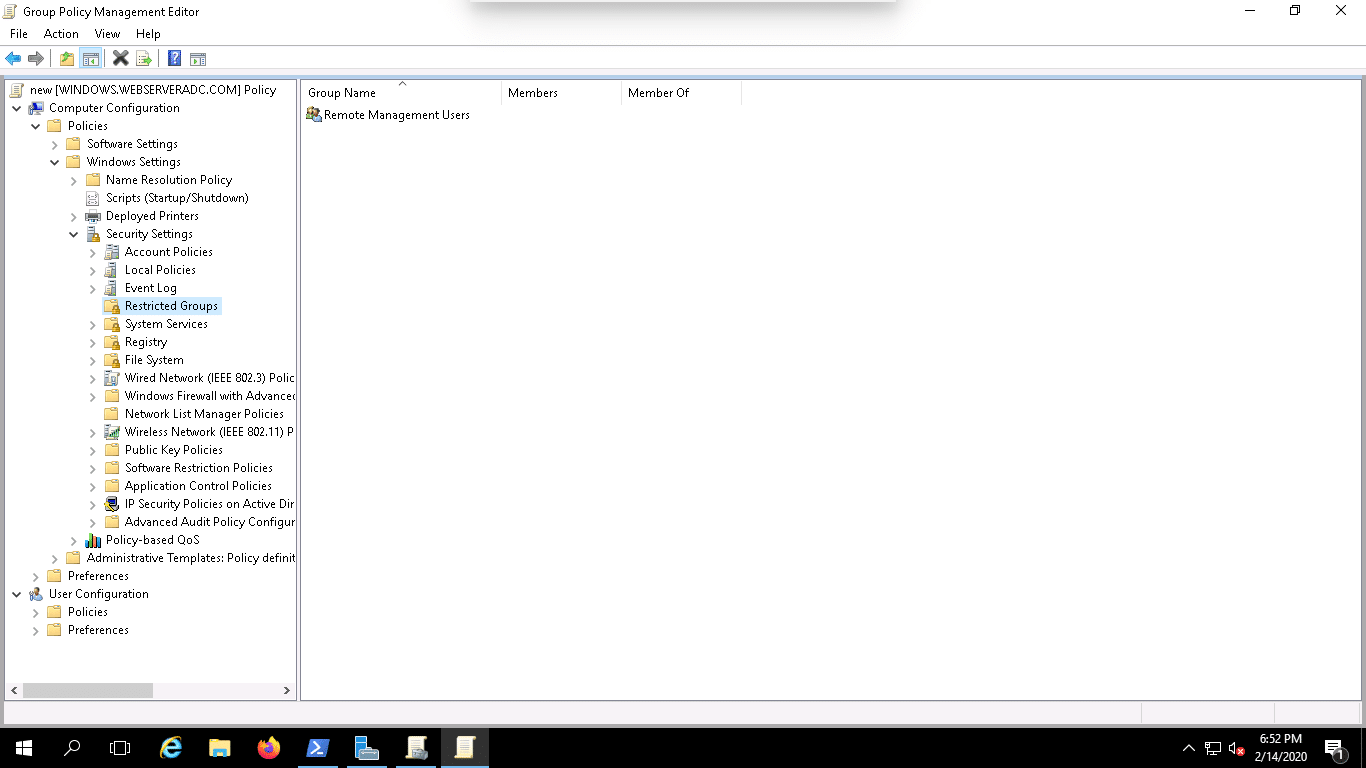
2. Navigate the Computer Configuration => Policies => Security Settings => Restricted Groups then right-click on the Restricted Groups and click on Add Group as shown below:
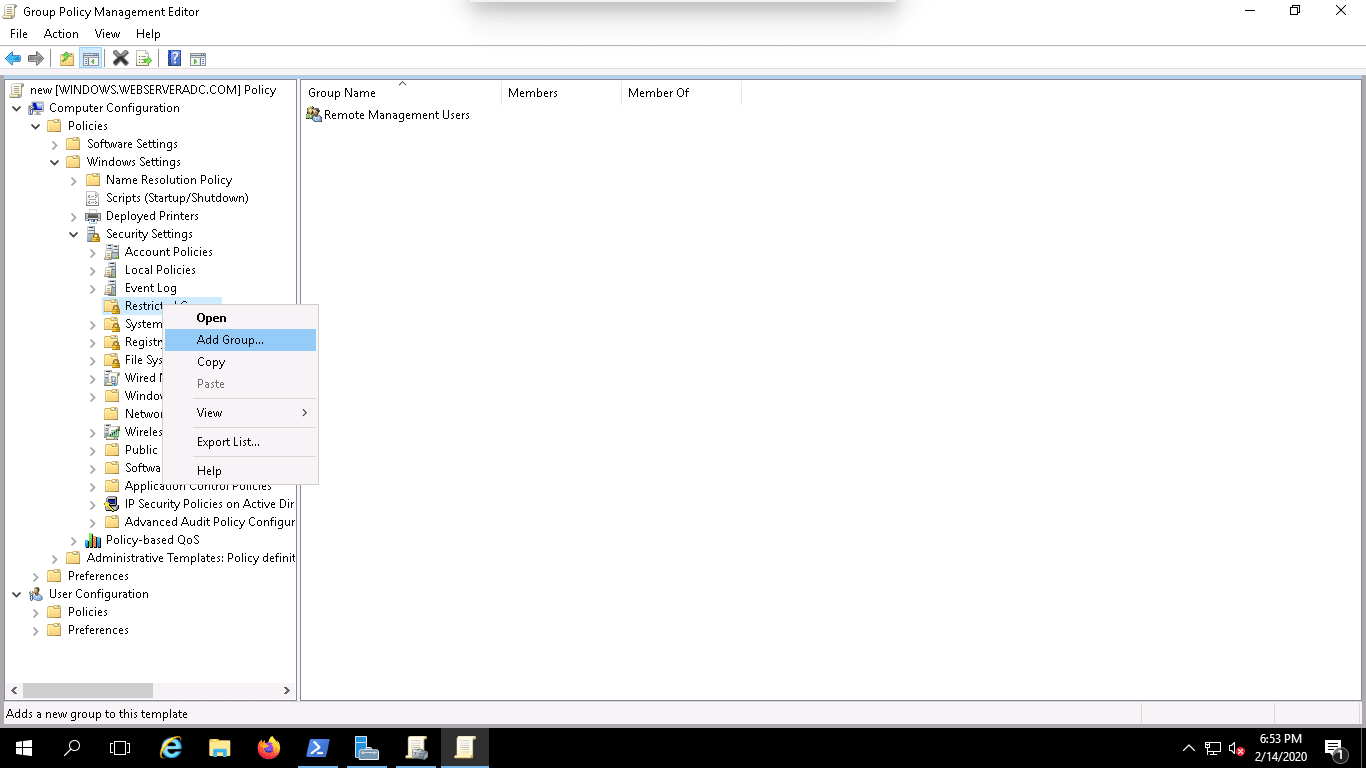

3. Add the Remote Management Users group and non-administrator user as shown below:
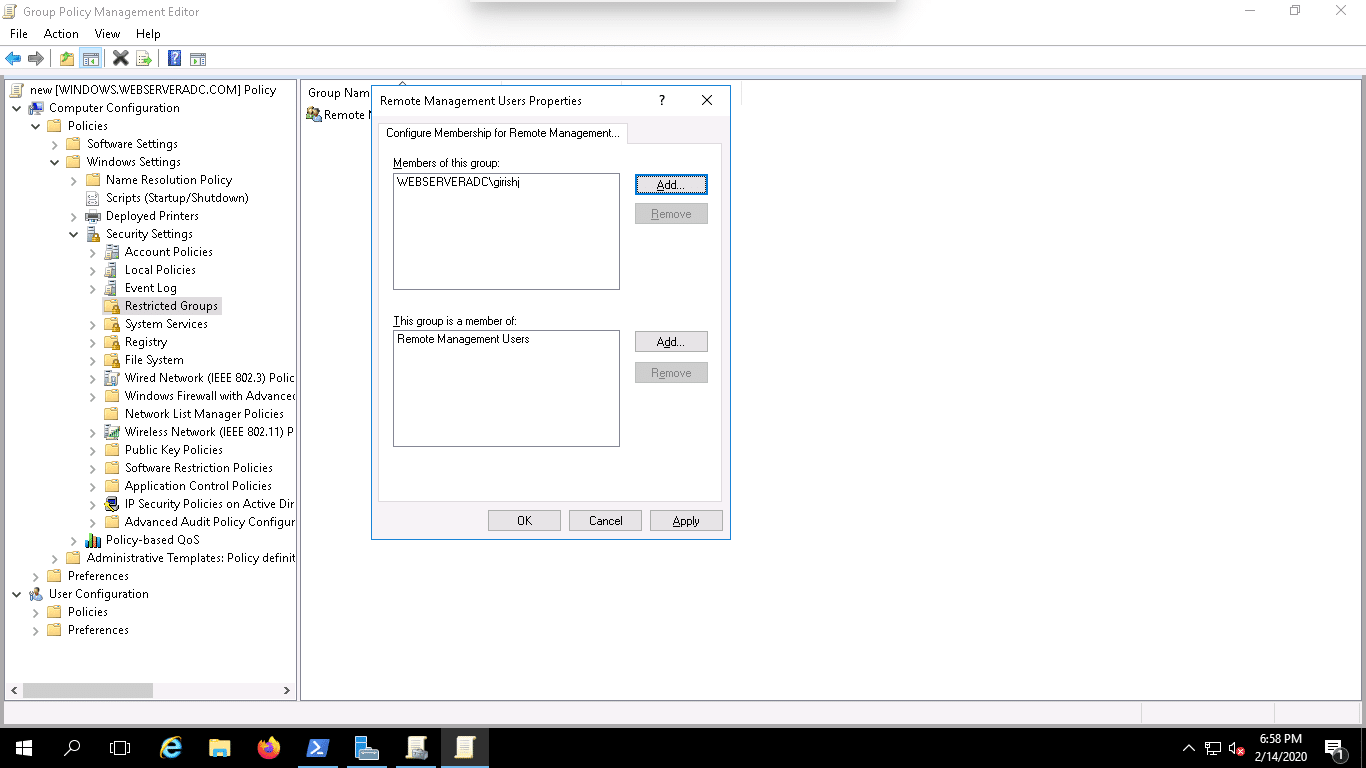
4. Click on the OK button to finish the process.
Enable PSRemoting Remotely with Group Policy
If you want to enable PSRemoting on multiple computers remotely, you can achieve this by configuring three group policies.
1. Enable the WinRM service
First you will need to enable the WinRM service through group policy.
You can follow the below steps to enable the WinRM service:
1. Open Group Policy Management Editor and Navigate to:
Computer Configuration => Policies => Administrative Templates => Windows Components => Windows Remote Management (WinRM) => WinRM Service as shown below:
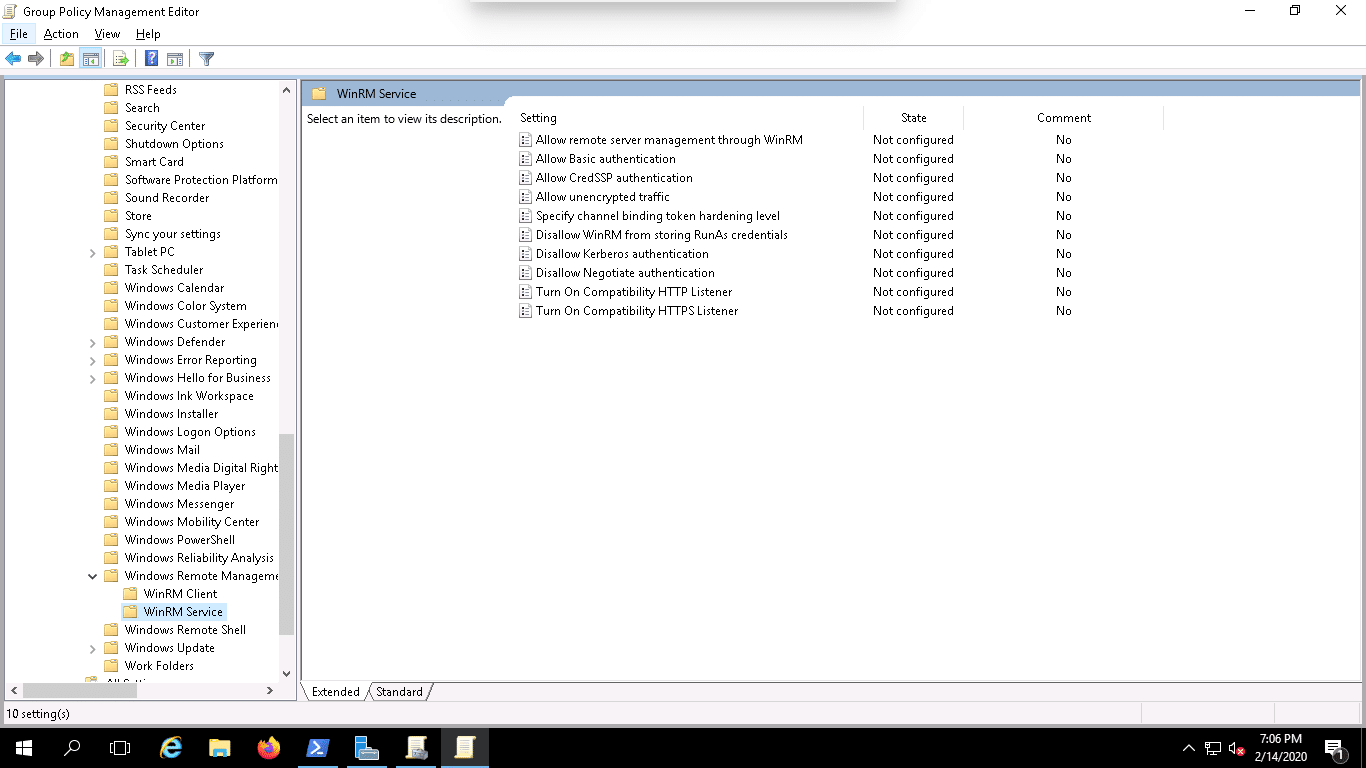
2. Click on the Allow remote server management through WinRM, you should see the following screen:

3. Next, enable this policy and set the IPv4/IPv6 filters to all (*) and click on the OK button.
2. Set the WS-Management service to automatic startup
You can follow the below steps to set the WS-Management service to automatic startup:
1. Open Group Policy Management Editor and Navigate to:
Computer Configuration => Policies => Windows Settings => Security Settings => System Services, you should see the following screen:
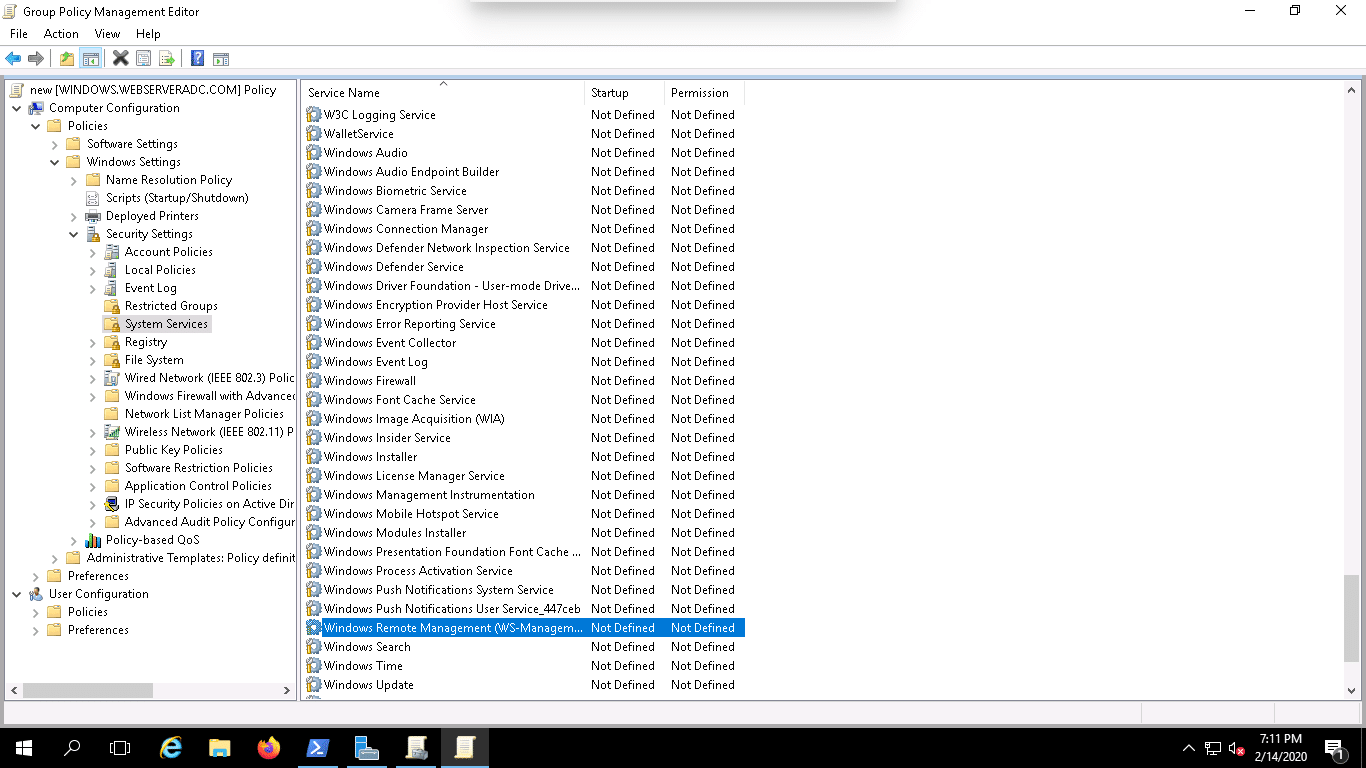
2. Now, click on the Windows Remote Management (WS-Management), you should see the following screen:
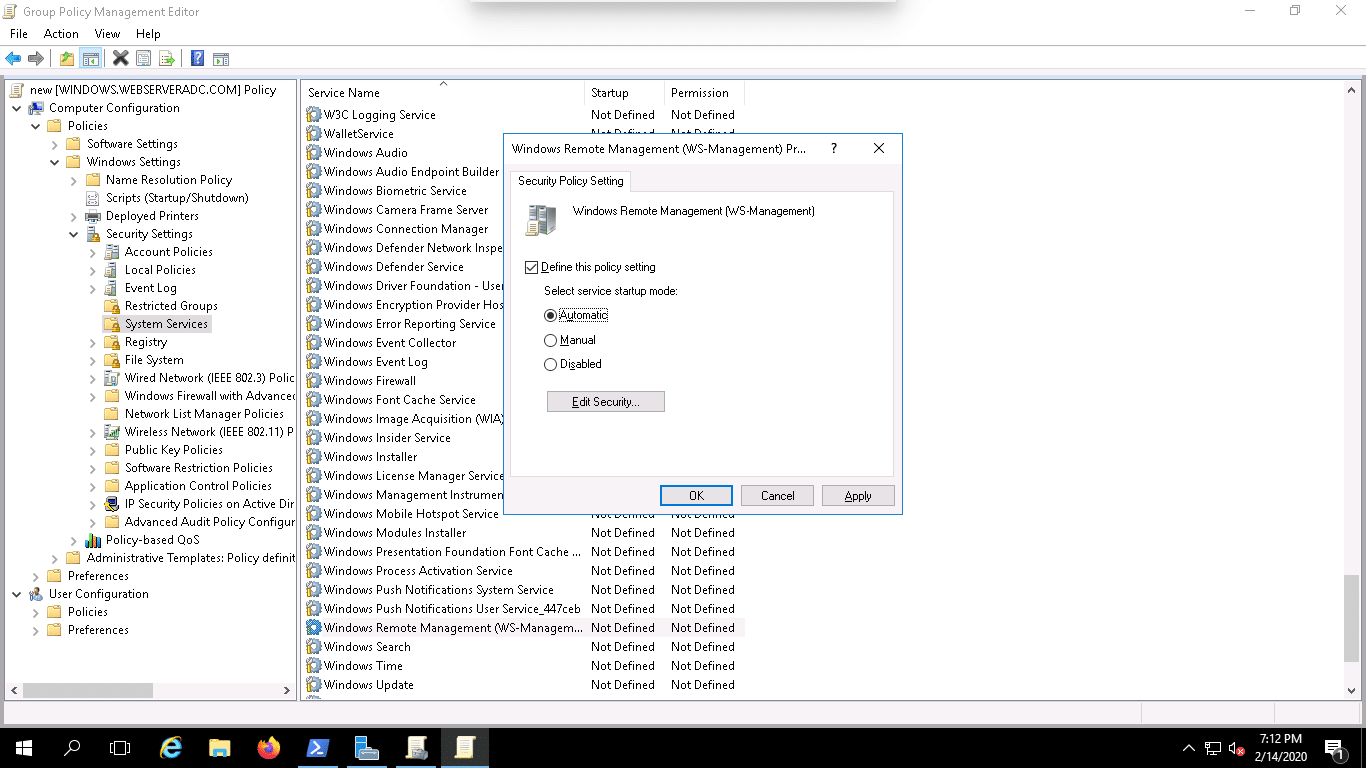
3. Now Enable this service to start automatically and click on the OK button.
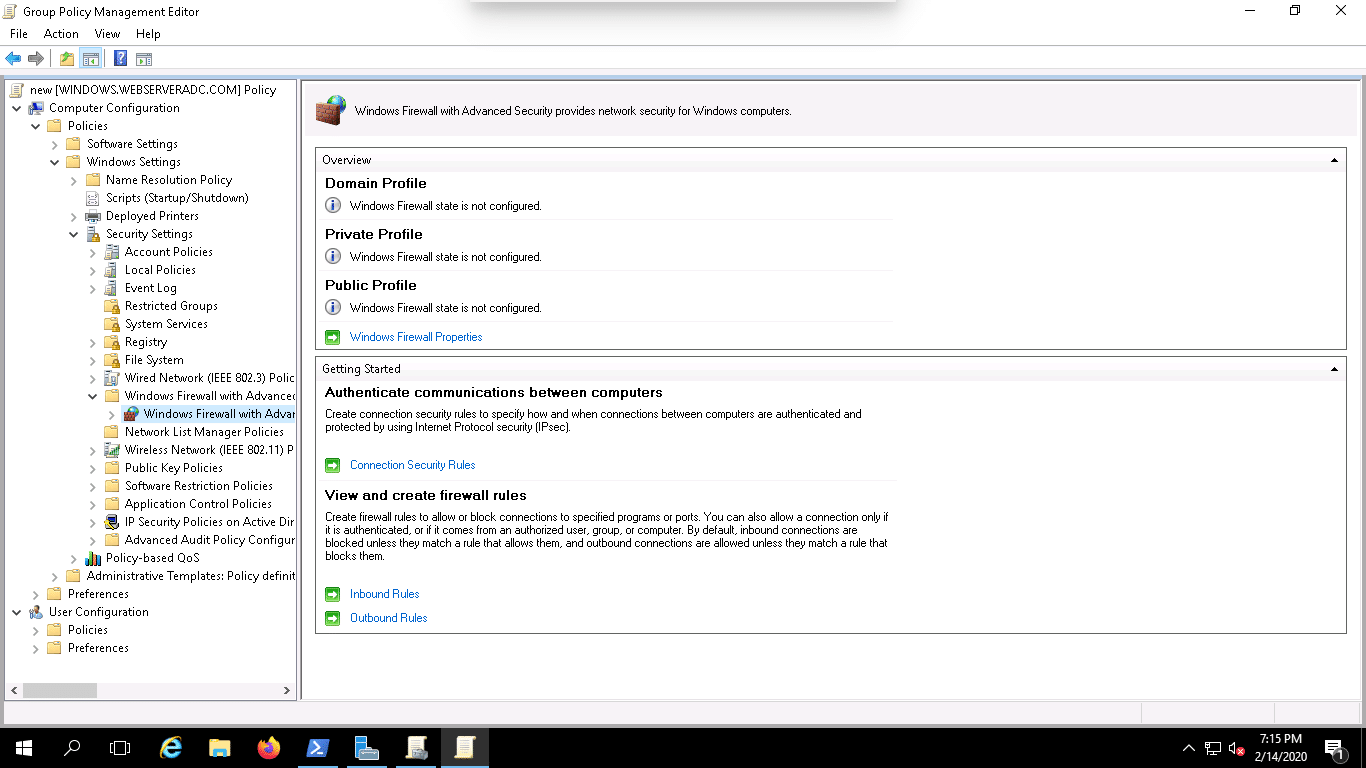
3. Allow Windows Remote Management in the Firewall
You can allow windows remote management in the firewall by following the below steps:
1. Open Group Policy Management Editor and Navigate to:
Computer Configuration => Policies => Windows Settings => Security Settings => Windows Firewall with Advanced Security => Windows Firewall with Advanced Security as shown below:
2. Next, right-click Inbound Rules and click New Rule, in the Predefined field, select Windows Remote Management as shown below:
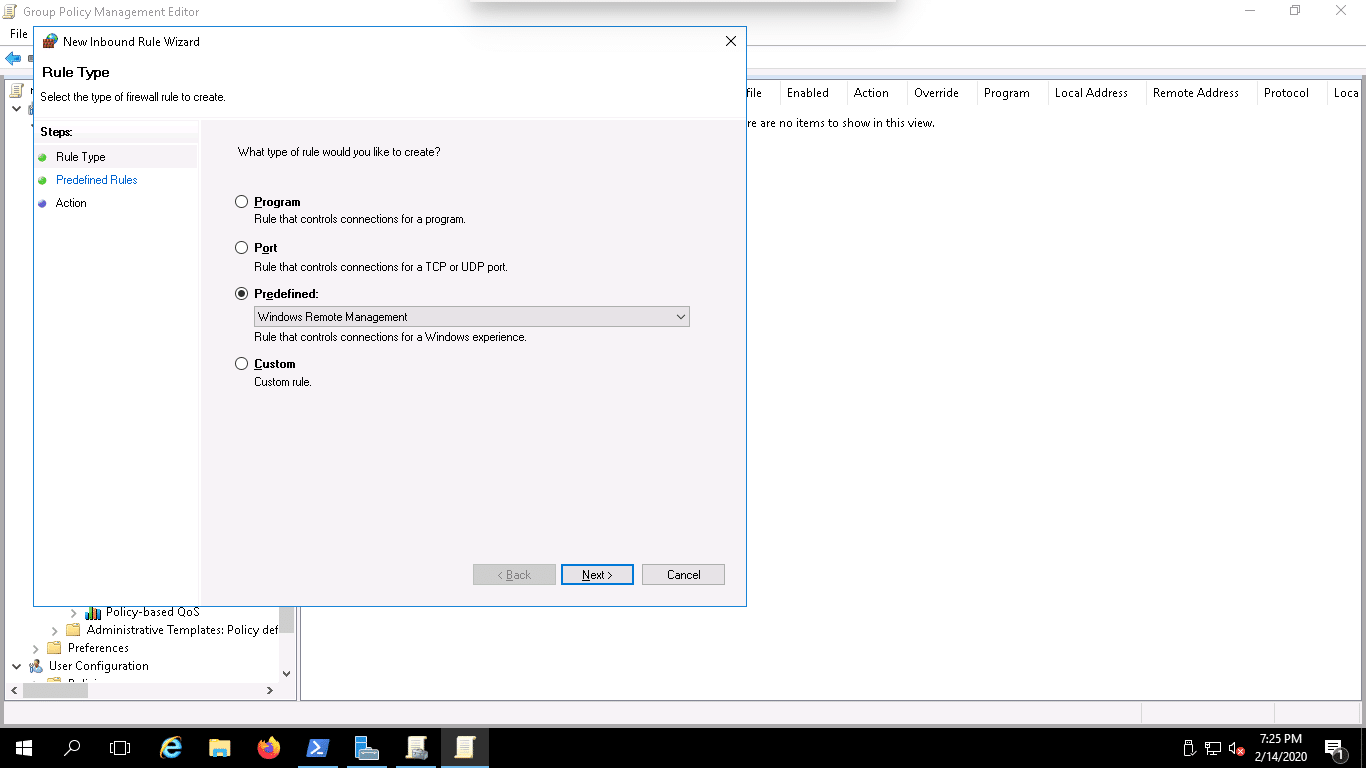
3. Then we’ll click on the Next button and follow the instruction to finish the setup.
Enable PSRemoting Remotely with PsExec
You can also enable the PSRemoting remotely using the Microsoft’s free remote-control tool PsExec.
Before using PsExec, you will need to open the ports for file and printer sharing.
You can open these ports using the Group Policy.
Follow the below steps to open the ports in Group Policy:
1. Open Group Policy Management Editor and Navigate to:
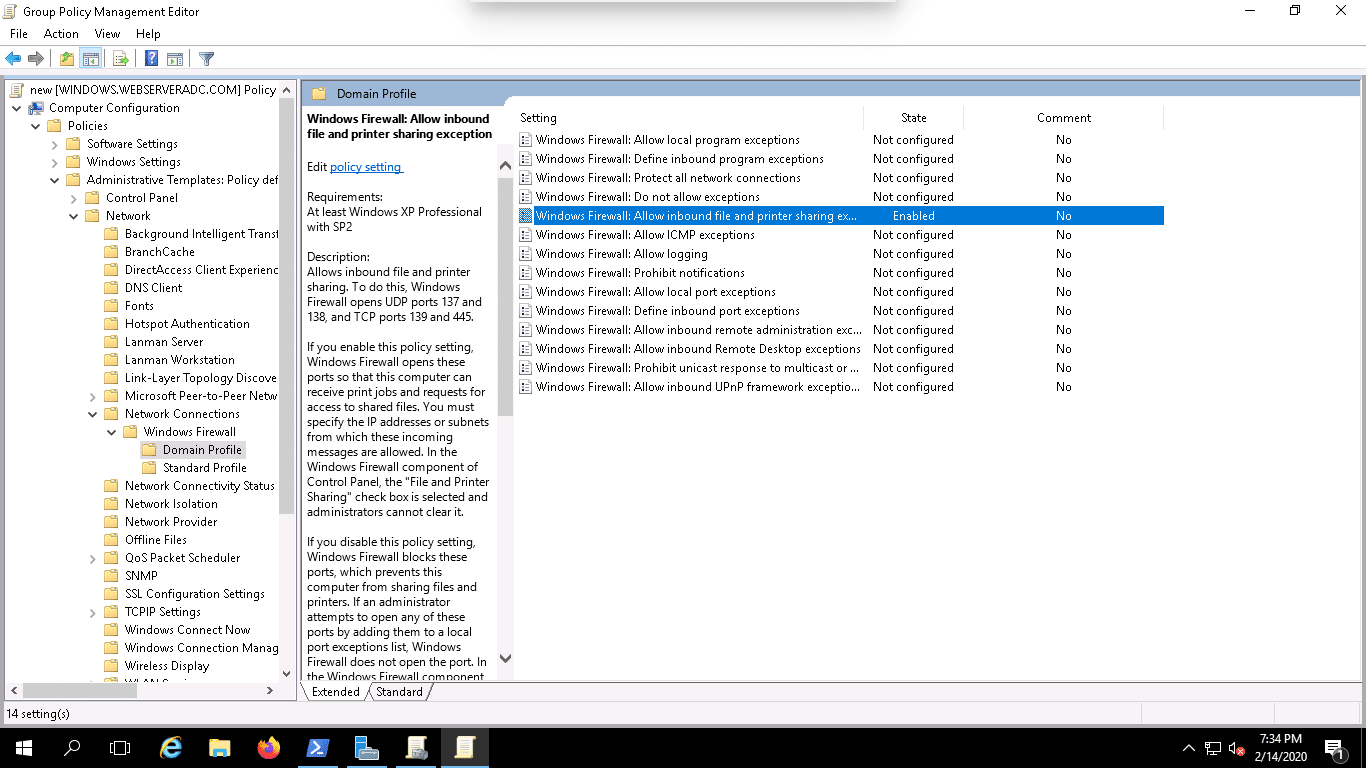
Computer Configuration => Administrative Templates => Network => Network Connections => Windows Firewall => Domain Profile as shown below:
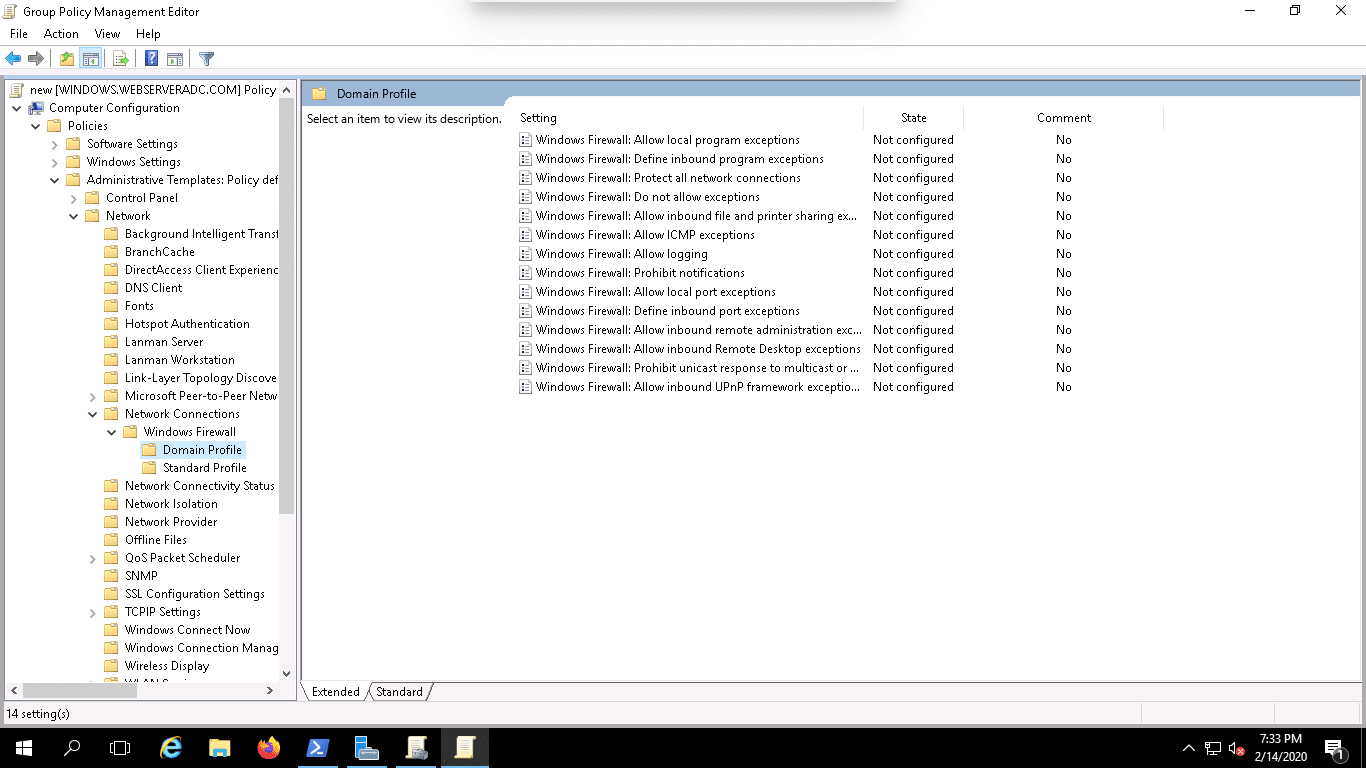
2. Here we’ll need to Enable inbound file and printer sharing exception or inbound remote administration exception as shown below:
Next, click here to download the PsExec tool and extract it in the download directory.
Next, open the PowerShell with the administrative user, go to the folder where you copied PsExec and run the following command to enable the PSRemoting in the remote computer:
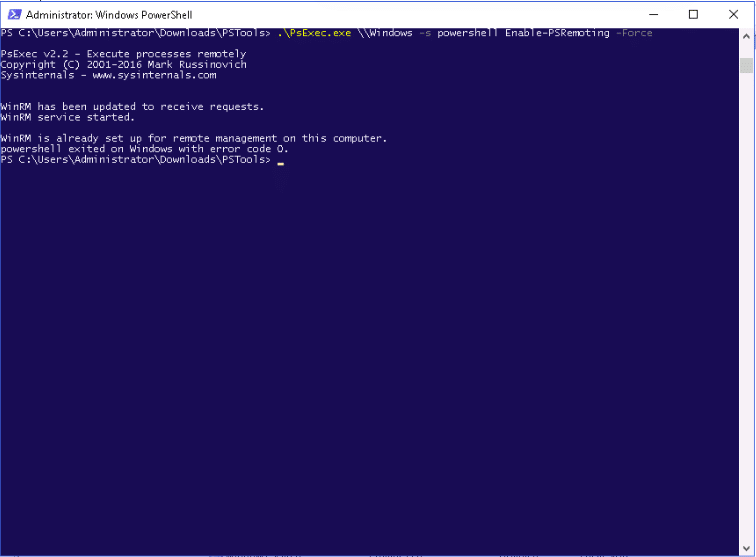
psexec.exe \\RemoteComputerName -s powershell Enable-PSRemoting -Force
For example, enable the PSRemoting on the remote computer named Windows with the following command:
psexec.exe \\Windows -s powershell Enable-PSRemoting -Force
You will be asked to agree the term of license as shown below:
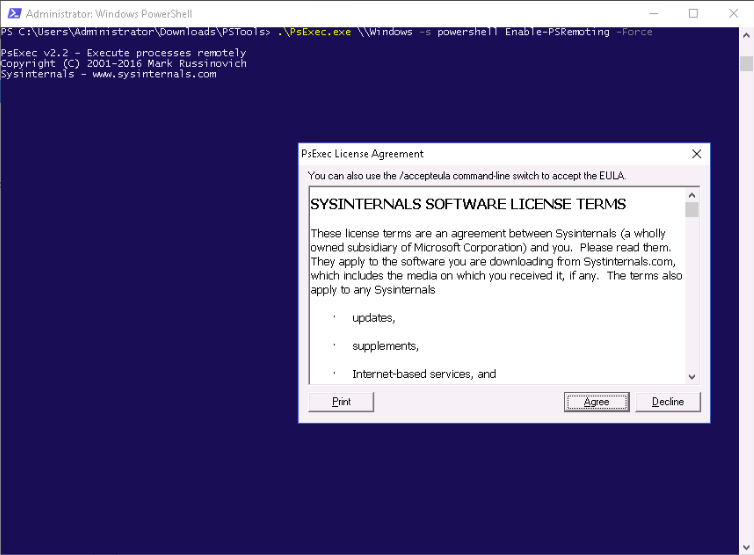
Click on the Agree button to enable the PSRemoting on the remote computer.
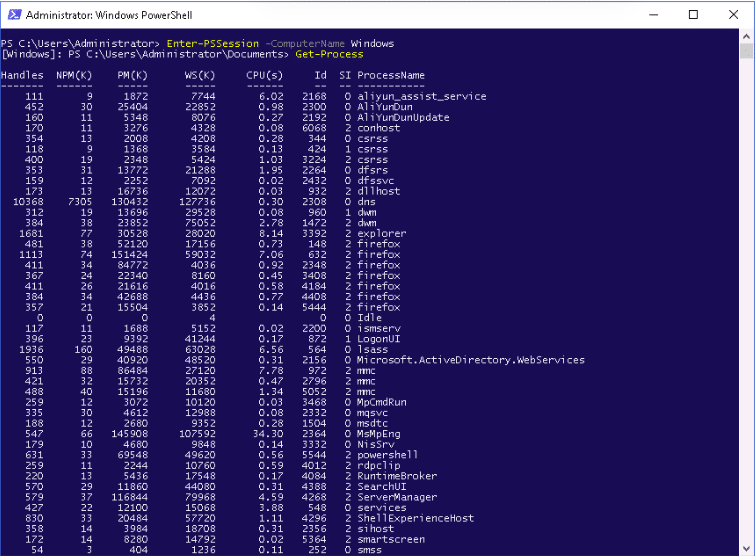
Working with PSRemoting
At this point, PSRemoting is enabled on the Windows machine.
Now it’s time to test whether PSRemoting is actually working or not.
First, lets open an interactive PSRemoting session with a remote computer named Windows with the following command:
Enter-PSSession -ComputerName Windows
Once connected, you should see the following output:
[Windows]: PS C:\Users\Administrator\Documents>
Next, execute the Get-Process command on the remote computer as shown below:
Get-Process
You should see all of the running processes on the remote computer in the following screen:
Conclusion
In the above Guide we’ve learned how to enable PSRemoting on Windows Server 2016 with several examples.
Hopefully you can now easily manage multiple remote Servers and computers with PSRemoting.
If you have any questions or comments, feel free to leave them in the comments section below!